GLx Series Installation Guide
Last updated: March 23rd, 2023 - 5 min. read
About this Guide
This guide provides instruction on how to install and configure your GLx series switch. This guide also provides mounting instructions and limited troubleshooting procedures. For more switch installation guides, refer to the switch installation guides section on our documentation website.
Product View and Physical Features
Front Panel
GL-24xT-P600D

GL-24xC-P600D

GL-24xB-P600D

Back Panel

Factory reset button
If the button is pressed and held for at least ten seconds and then released, the switch will reboot and be restored to its original factory settings by deleting all configuration information stored on the unit.
Port and Status LEDs
Package contents
Pre-Install Preparation
You should complete the following steps before going on-site to perform an installation.
Configure your dashboard network
- Login to https://ui.readylinks.io. If this is your first time, create a new account.
- Claim your switches. You will need your ReadyLinks mac address (found on the device) which looks like 0013xxxxxxxx.
- Find the network to which you plan to add your switches or create a new network.
- Go to the map view and place each switch on the map by clicking and dragging it to the location where you plan to mount it.
Check and configure firewall
If a firewall is in place, it must allow outgoing connections on particular ports to particular IP addresses. The most current list of outbound ports and IP addresses for your particular organization can be found on the firewall configuration page in your dashboard.
Assign an IP Address
All switches must be assigned routable IP addresses. These IP addresses can be dynamically assigned via DHCP or statically assigned.
Dynamic Assignment
When using DHCP, the DHCP server should be configured to assign a static IP address for each MAC address belonging to a ReadyLinks switch. Other features of the network, such as 802.1X authentication, may rely on the property that the switches have static IP addresses.
Static Assignment
Static IPs are assigned using the local web server on each switch. The following procedure describes how to set the static IP:
- Using a client machine (e.g., a laptop), connect to the switch over a wired connection.
- Using a web browser on the client machine, access the switch locally via serial. Enter the the VLAN interface for management.
- Configure the static IP address, net mask, gateway IP address and DNS servers that this switch will use on its management connection. If necessary, reconnect the switch to the LAN.
Installation Instructions
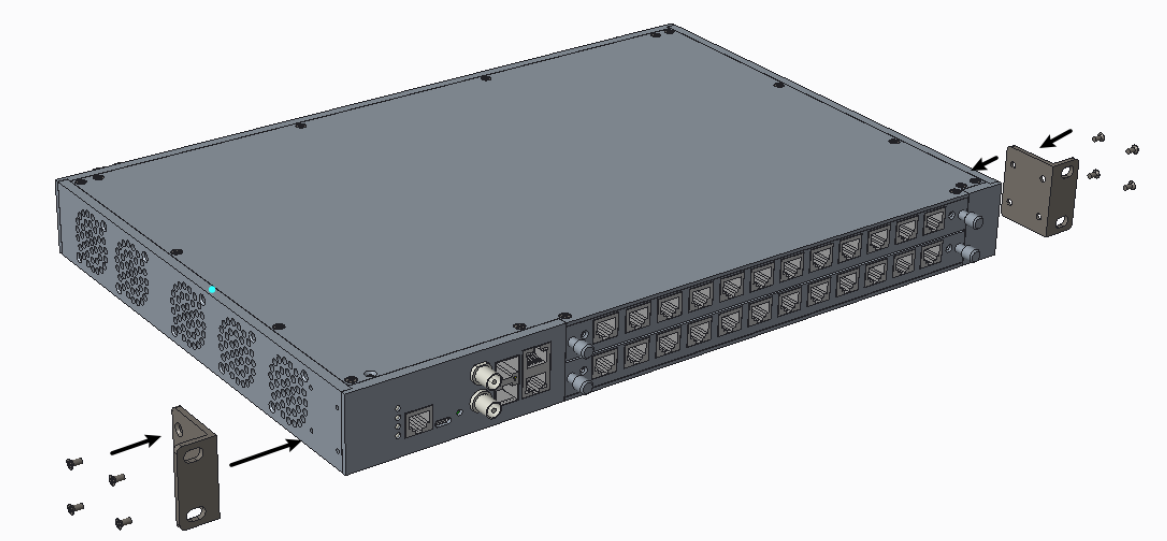
1. Fix the brackets on the side of the device using 8 * M3 flat head screws.
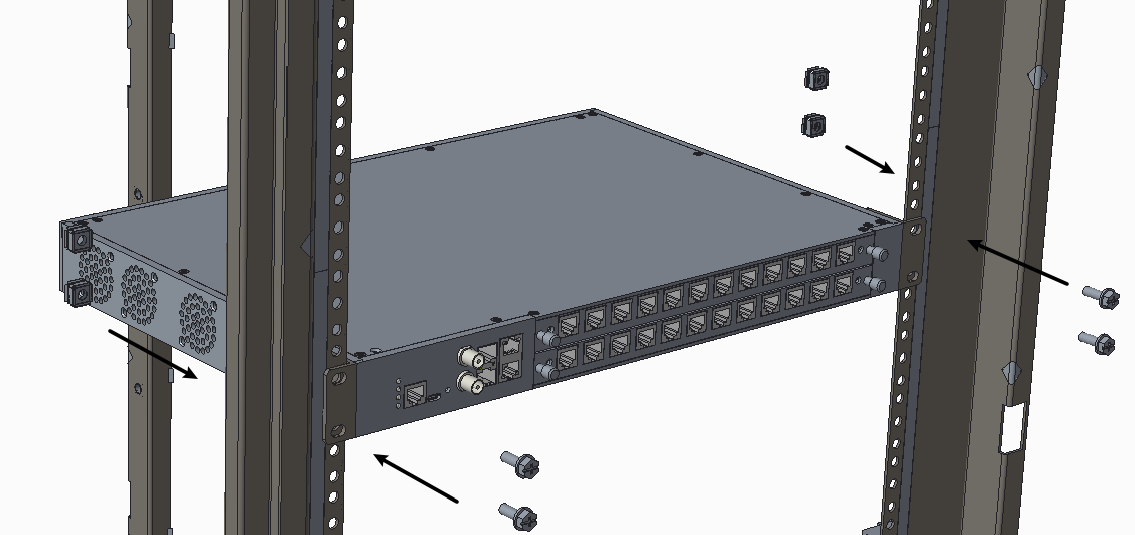
2. Install the GLx chassis in a 19" rack with M6 screws and nuts.
3. Connect the power supply to the unit.
Mounting hardware
The mounting hardware includes a rack mount kit for standard 1U racks. When installing the device, make sure that there is sufficient space between the rear of the rack and other obstacles to ensure adequate airflow.