GLxH Series Installation Guide
Last updated: May 2nd, 2023 - 5 min. read
About this Guide
This guide provides instruction on how to install and configure your GLx series switch. This guide also provides mounting instructions and limited troubleshooting procedures. For more switch installation guides, refer to the switch installation guides section on our documentation website.
Product View and Physical Features
Front Panel
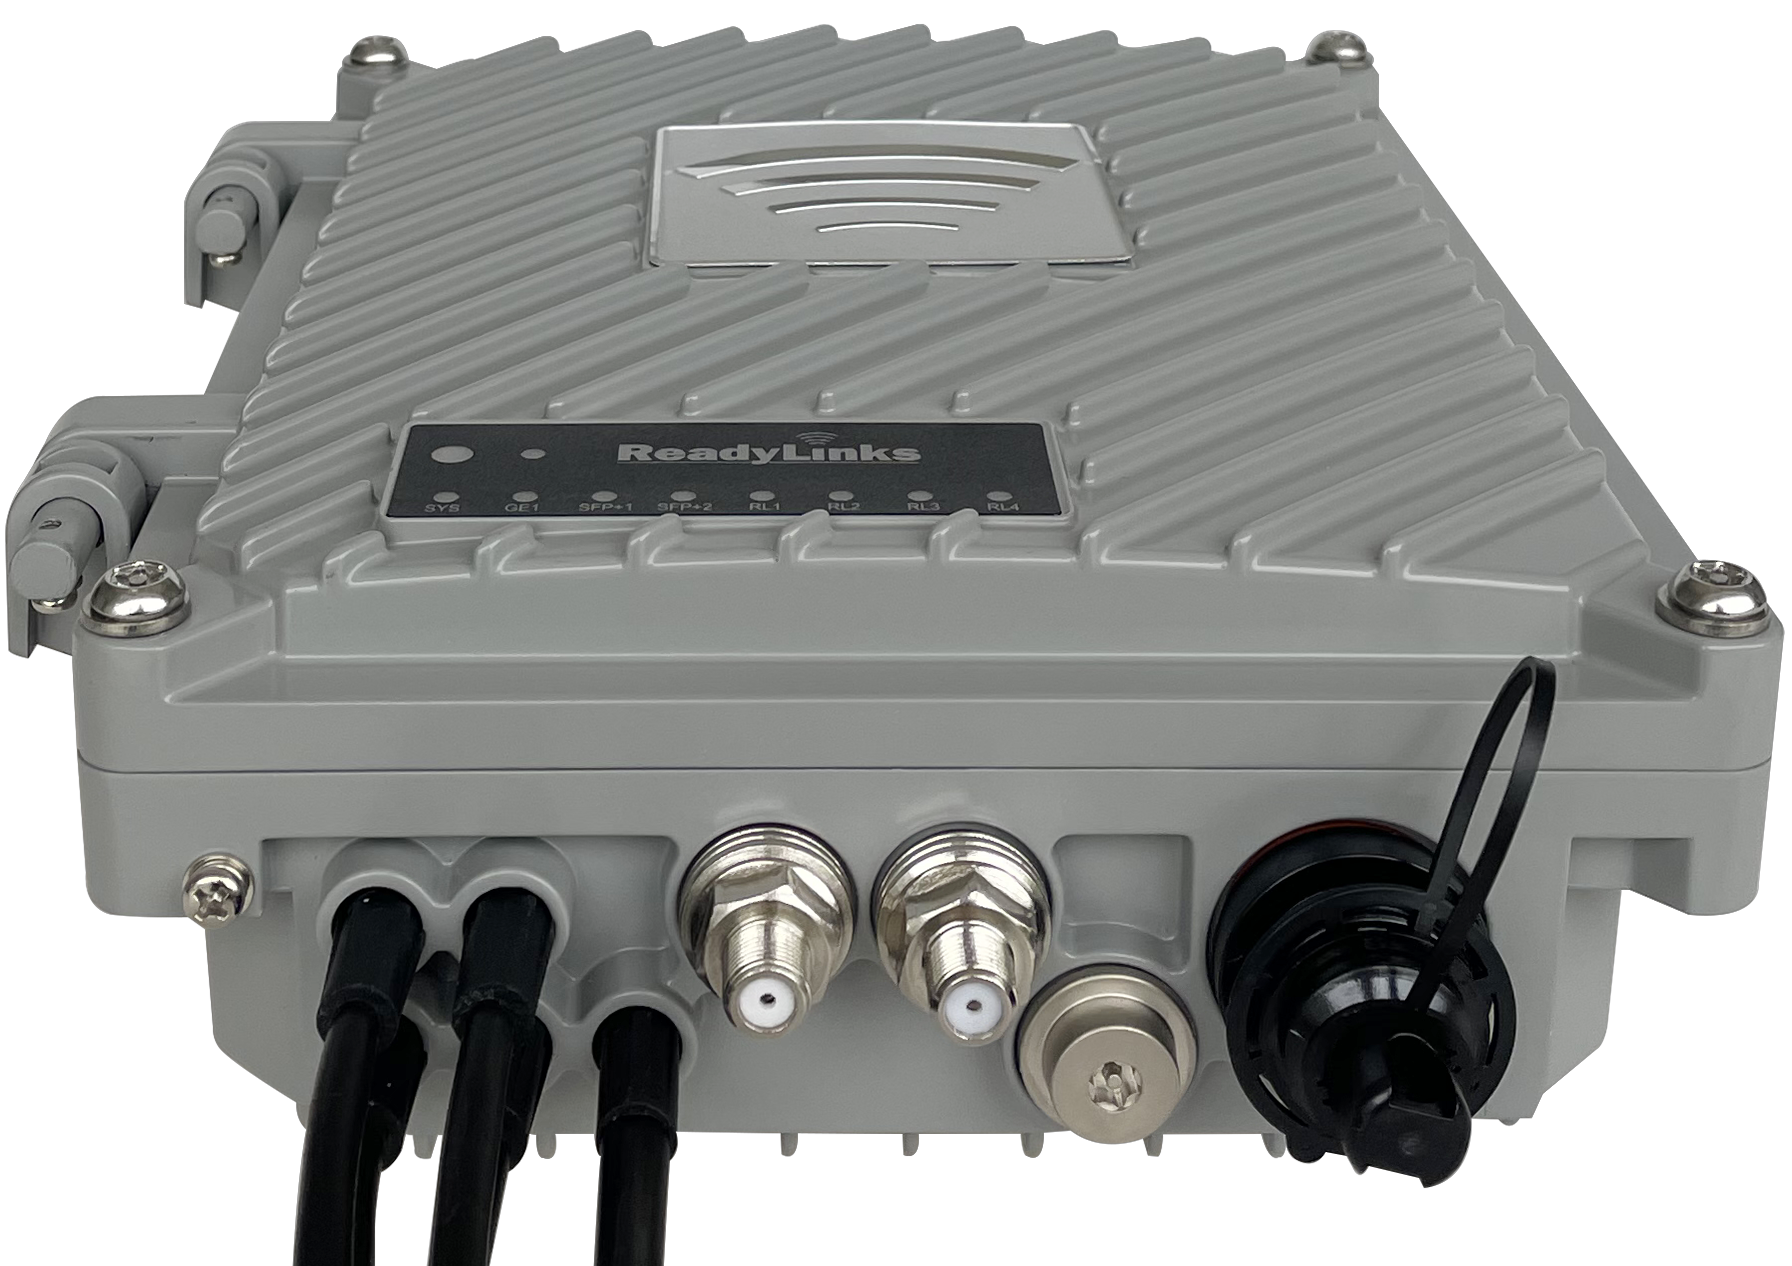
GL-4xTH-RPF
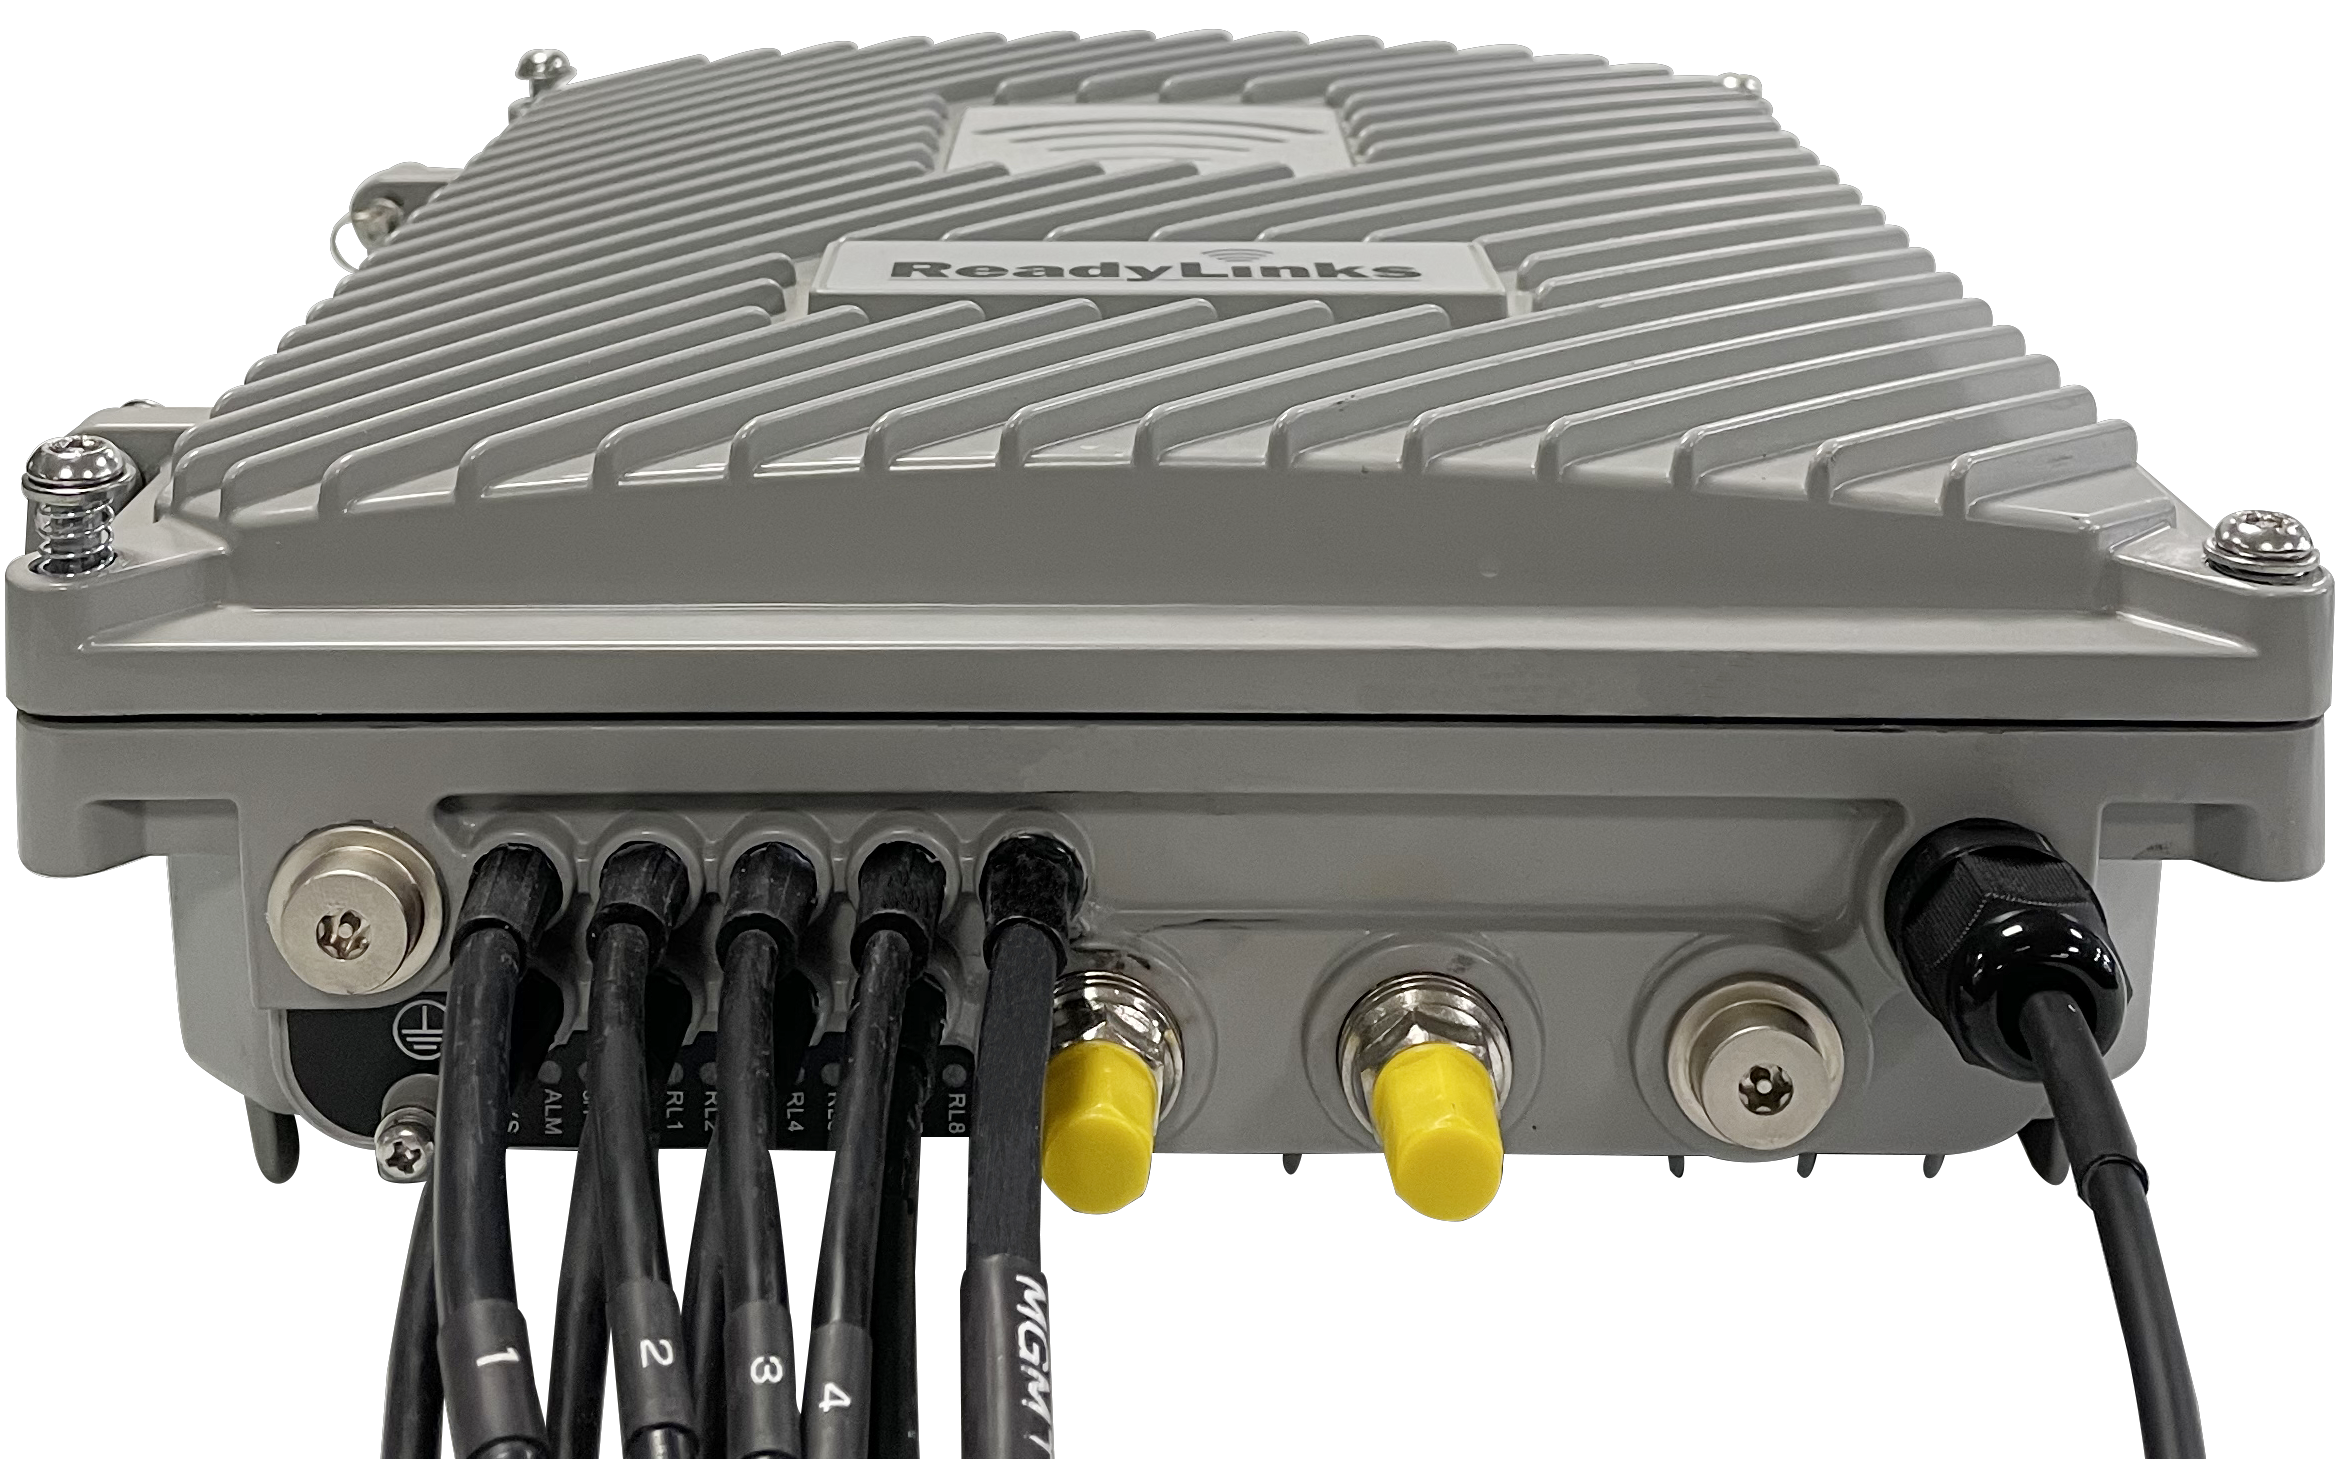
GL-8xTH-RPF
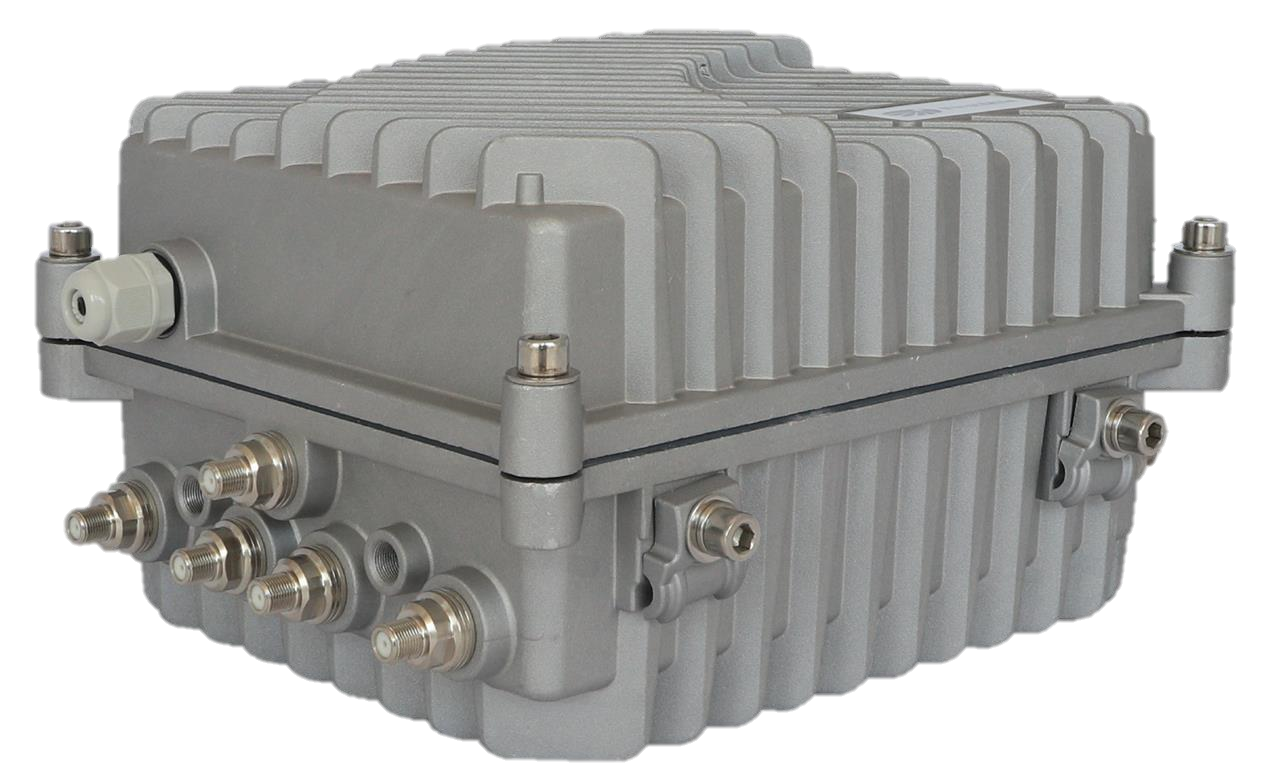
GL-8xCH
Factory reset button
If the button is pressed and held for at least ten seconds and then released, the switch will reboot and be restored to its original factory settings by deleting all configuration information stored on the unit.
Port and Status LEDs
Package contents
Pre-Install Preparation
You should complete the following steps before going on-site to perform an installation.
Configure your dashboard network
- Login to https://ui.readylinks.io. If this is your first time, create a new account.
- Claim your switches. You will need your ReadyLinks mac address (found on the device) which looks like 0013xxxxxxxx.
- Find the network to which you plan to add your switches or create a new network.
- Go to the map view and place each switch on the map by clicking and dragging it to the location where you plan to mount it.
Check and configure firewall
If a firewall is in place, it must allow outgoing connections on particular ports to particular IP addresses. The most current list of outbound ports and IP addresses for your particular organization can be found on the firewall configuration page in your dashboard.
Installation Instructions
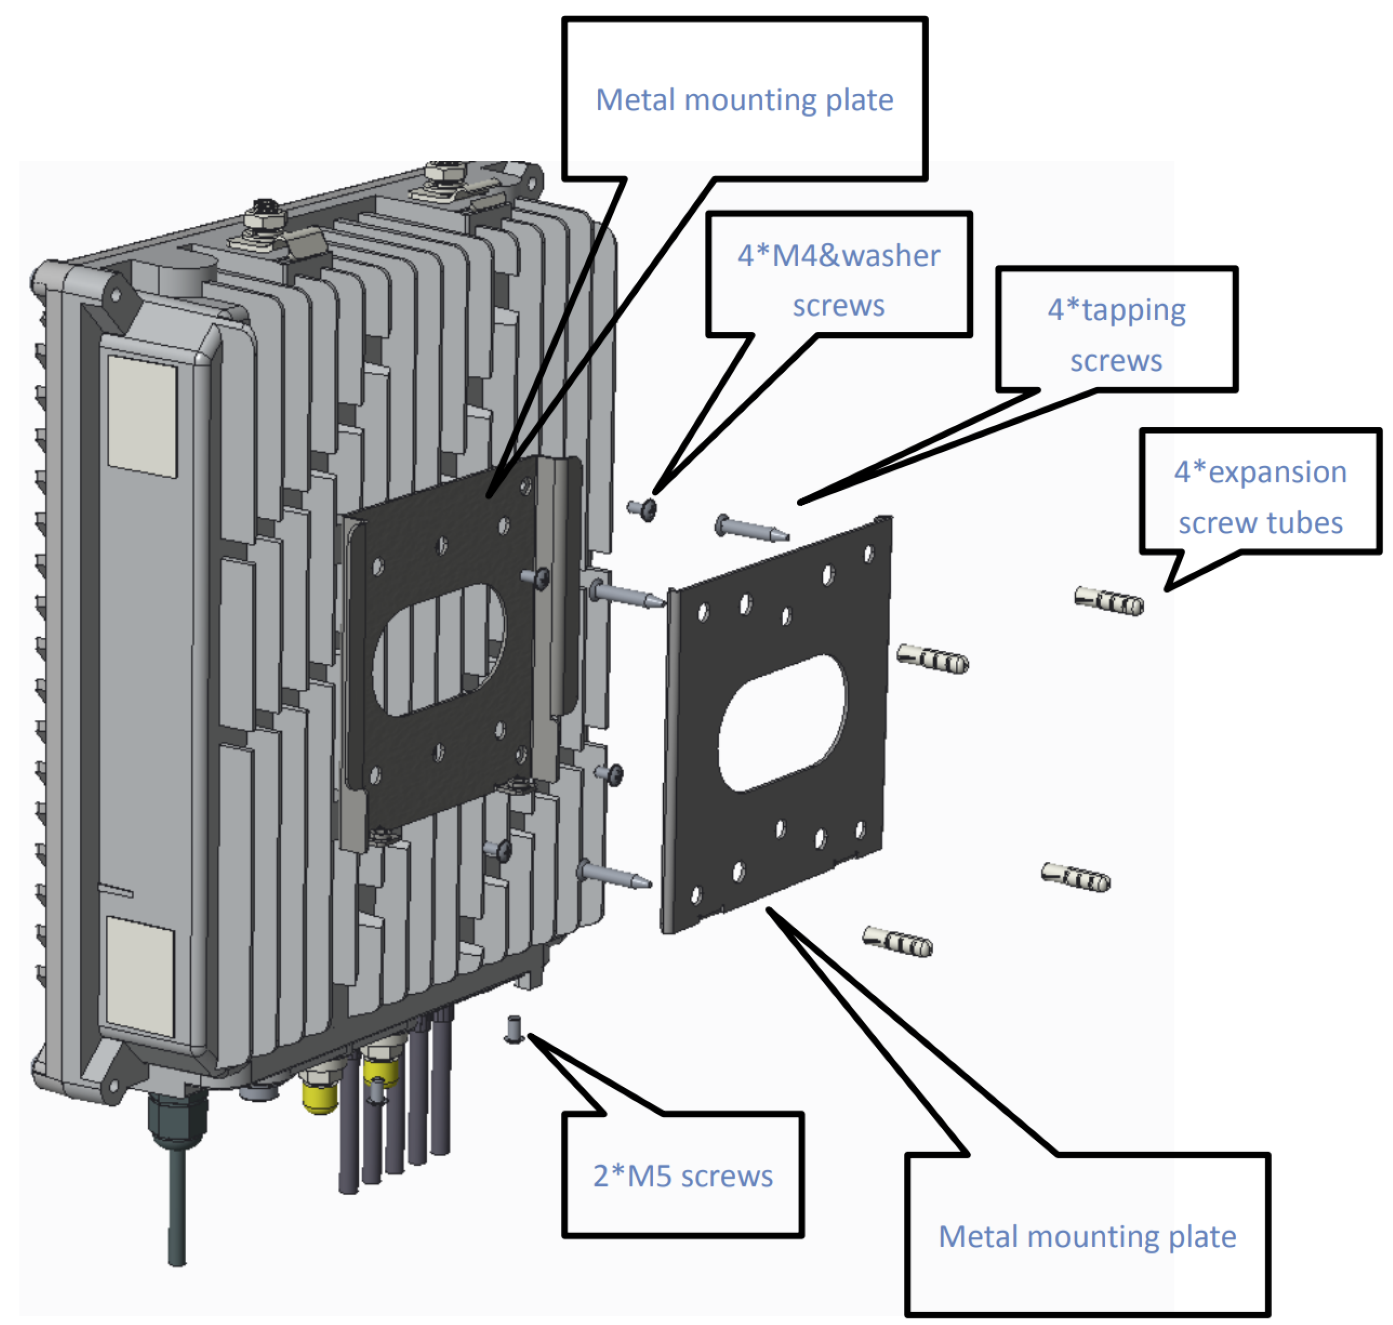
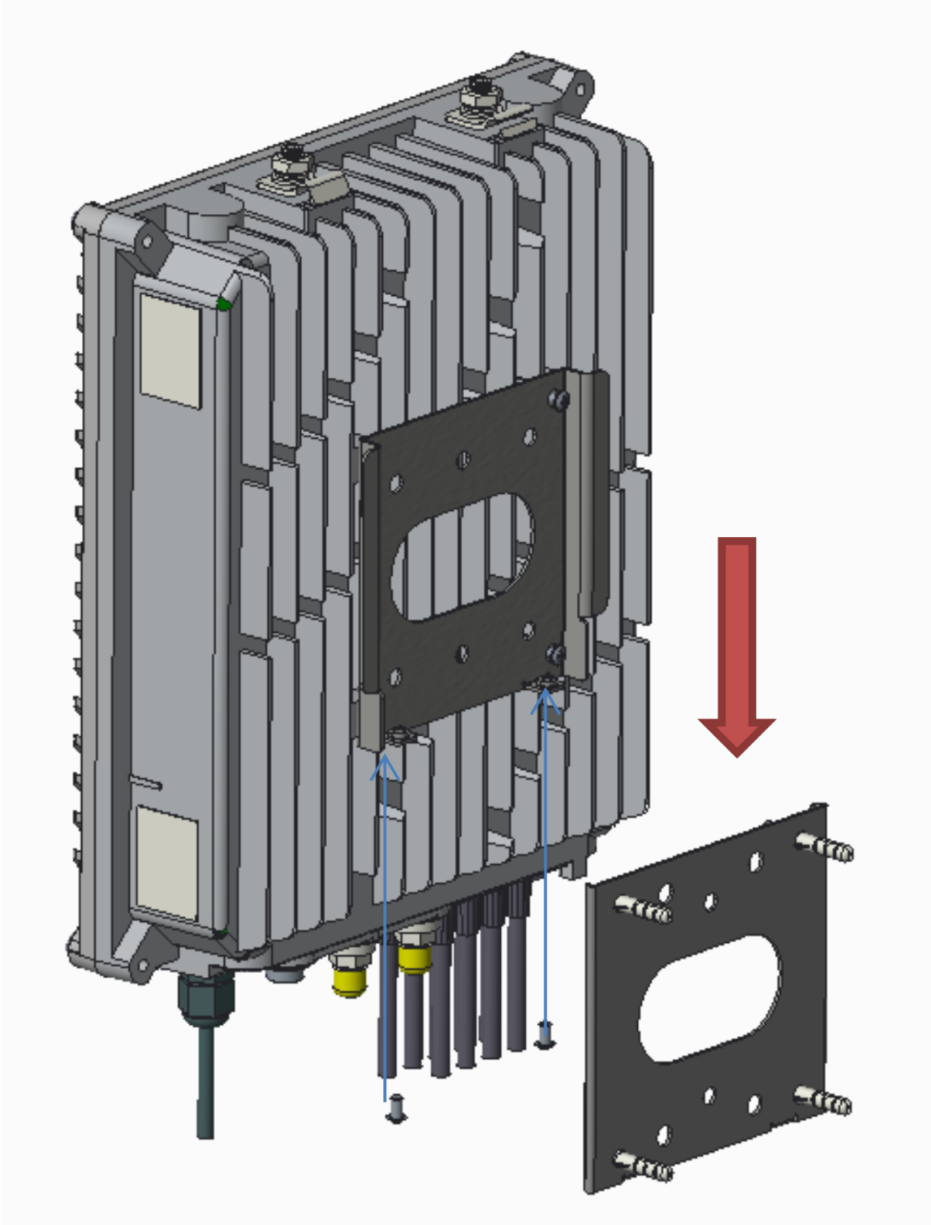
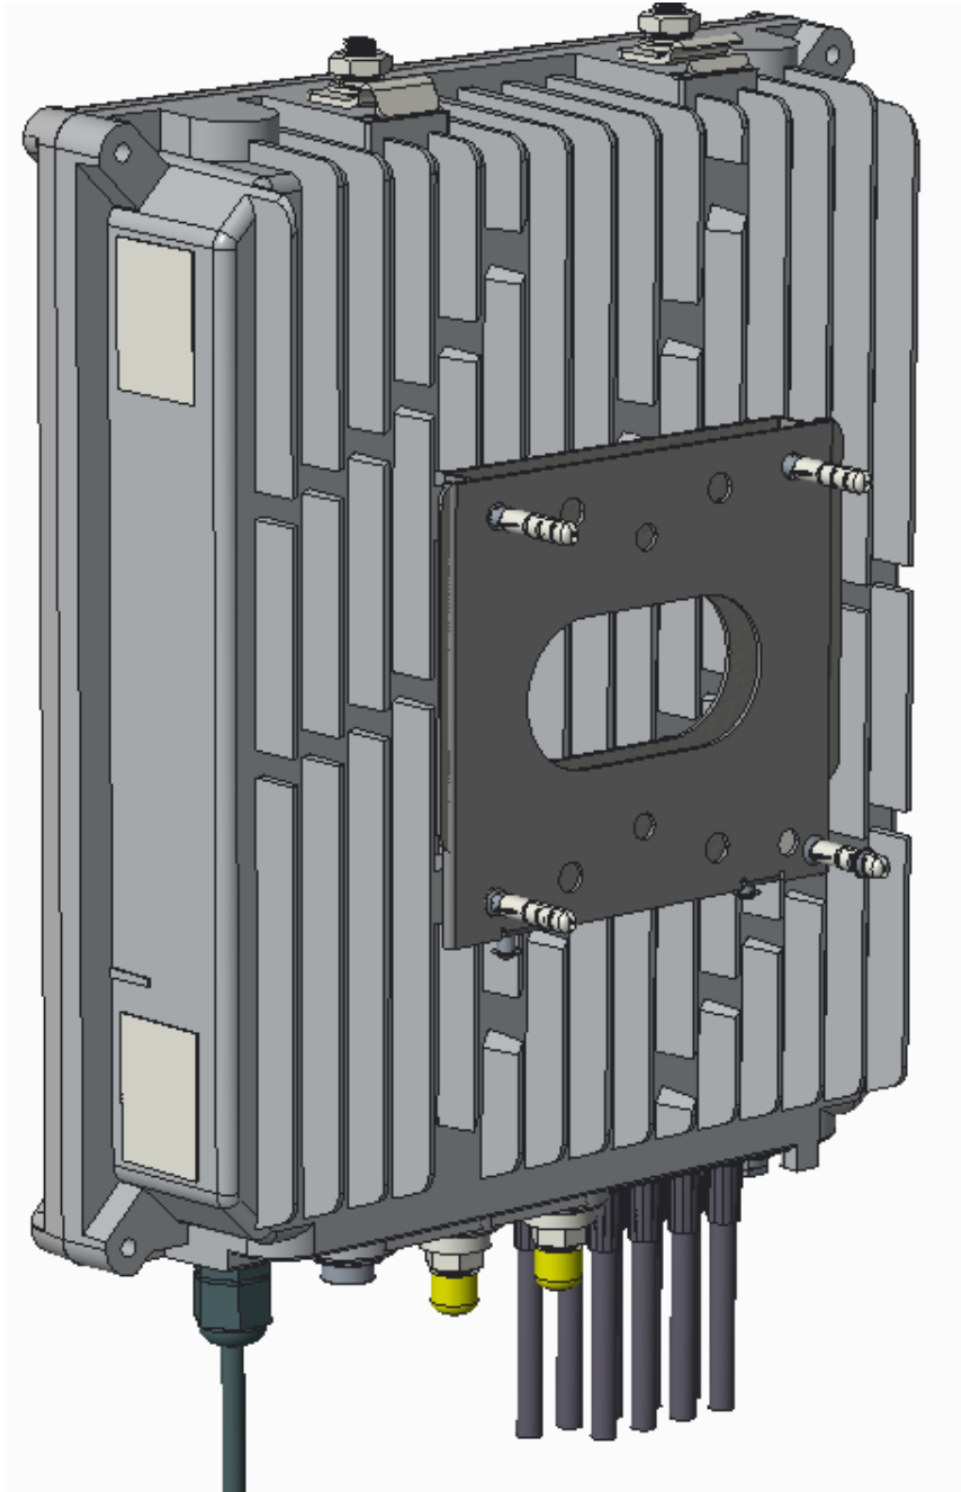
Wall Mount
1. Fix one side of the mounting plate on the wall.
2. Fix the other plate on the back of the device.
3. Slide the device over the mounting plate and install the security screw.
Pedestal
1. Install the metal wings face down pointing toward the back of the device.
2. Hang the unit on the internal crossbar of the pedestal.
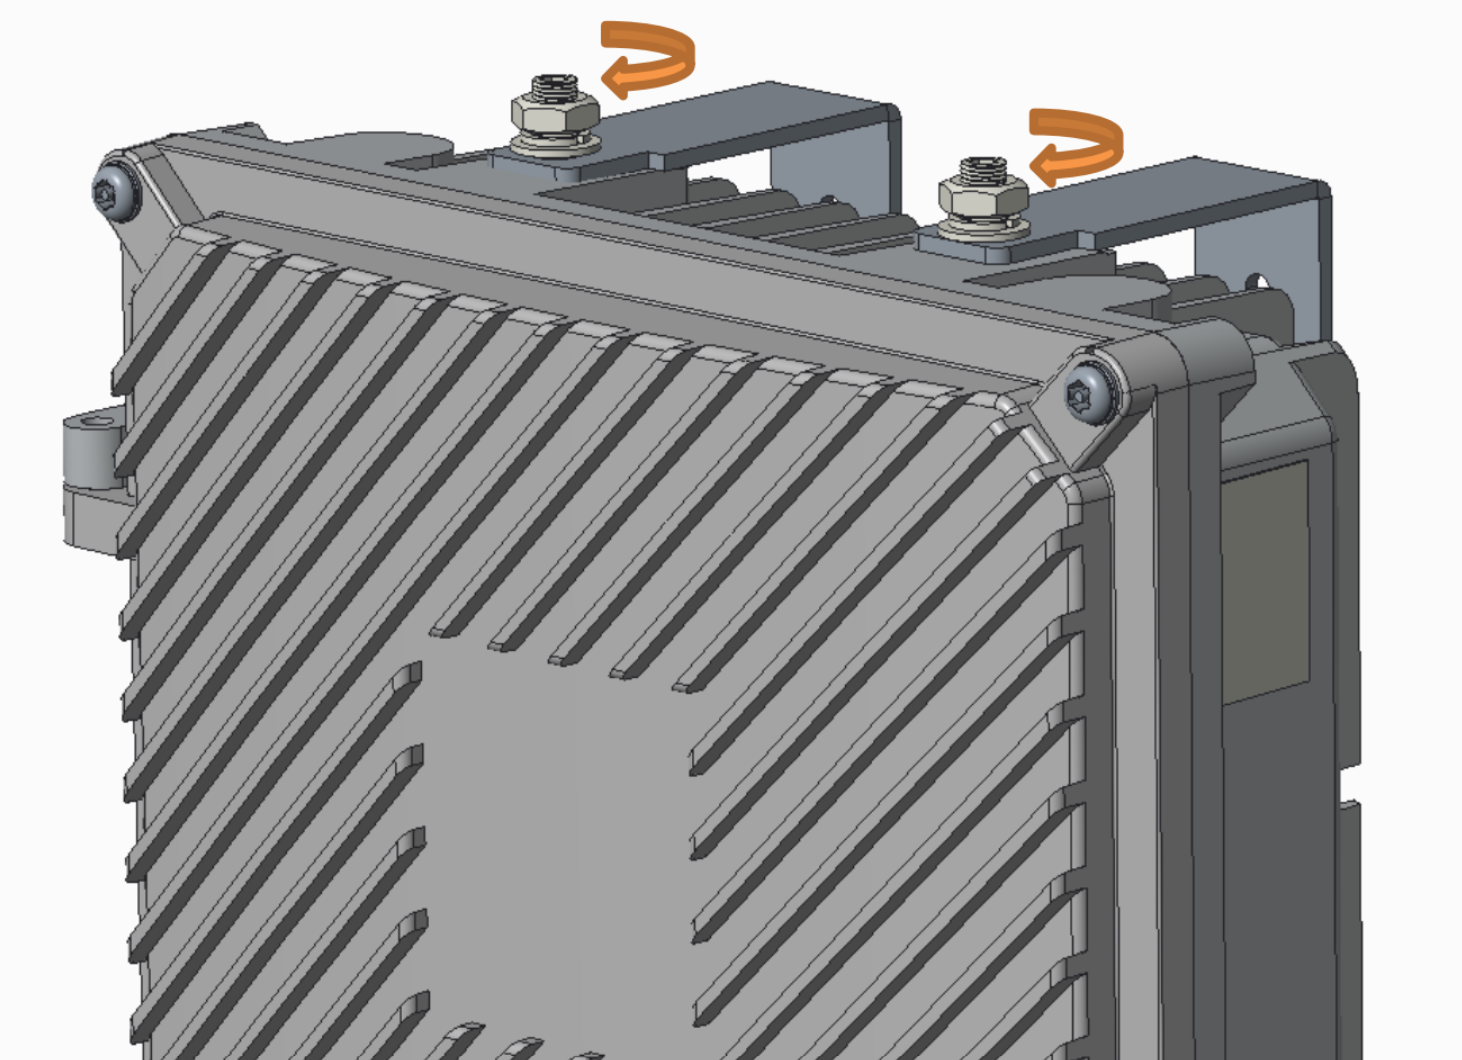
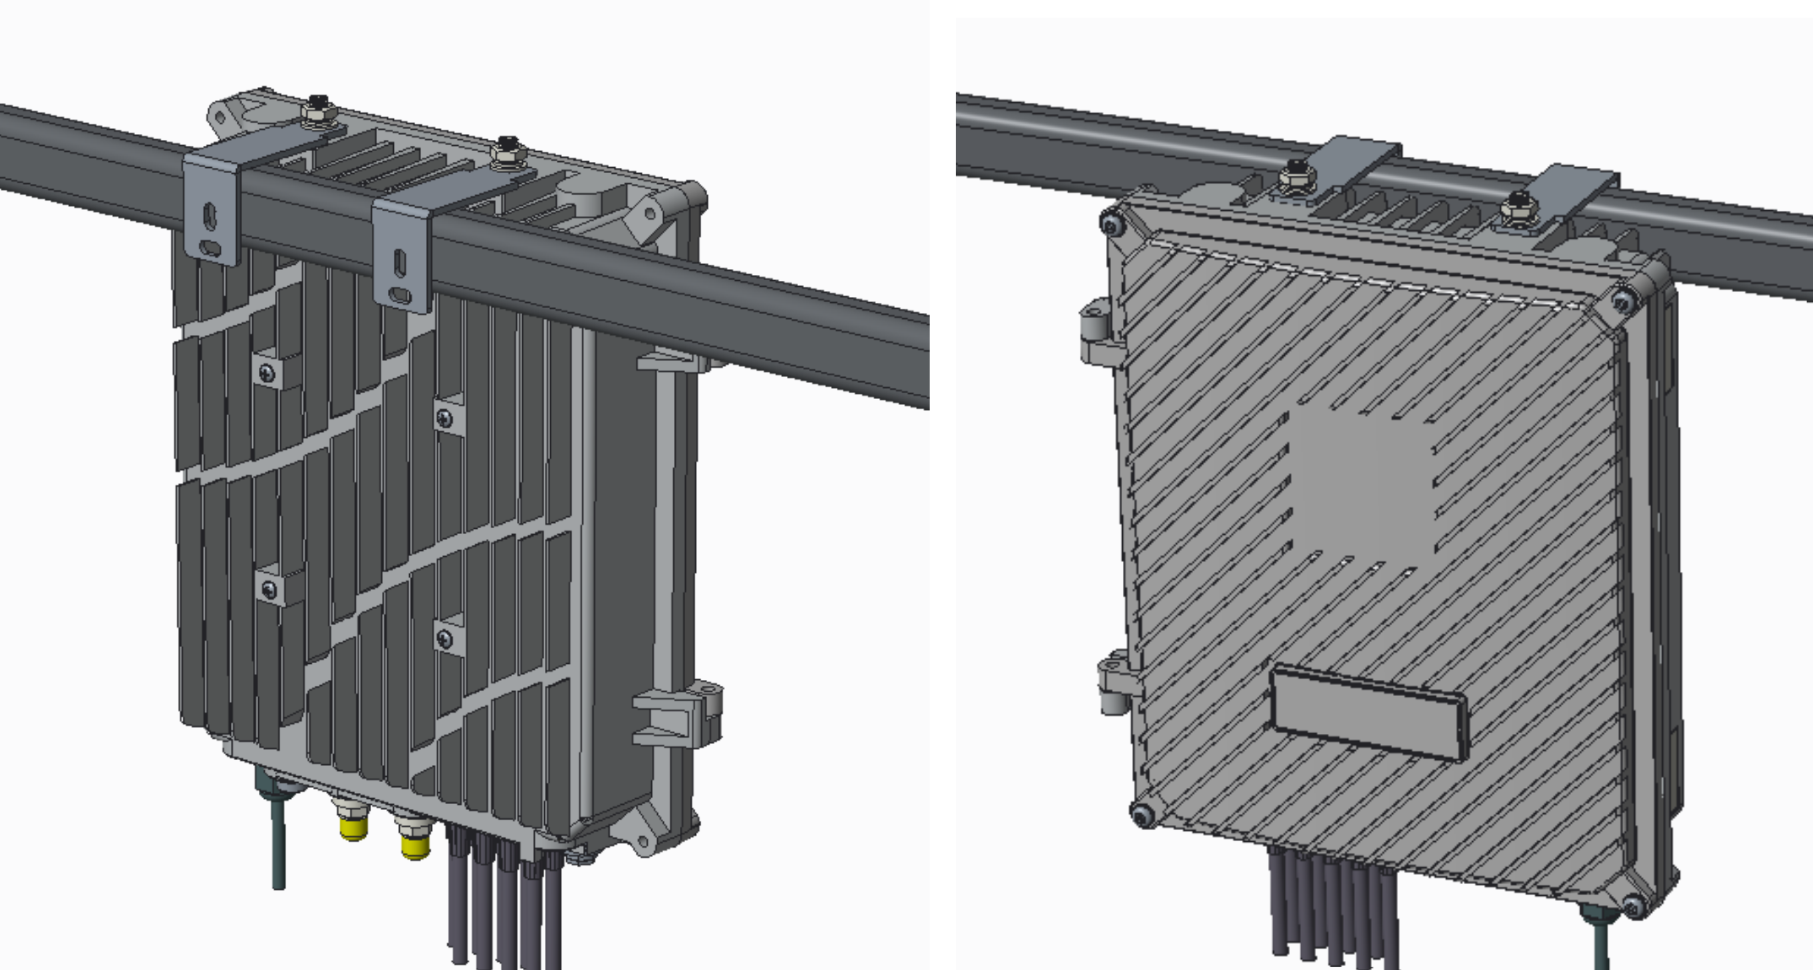
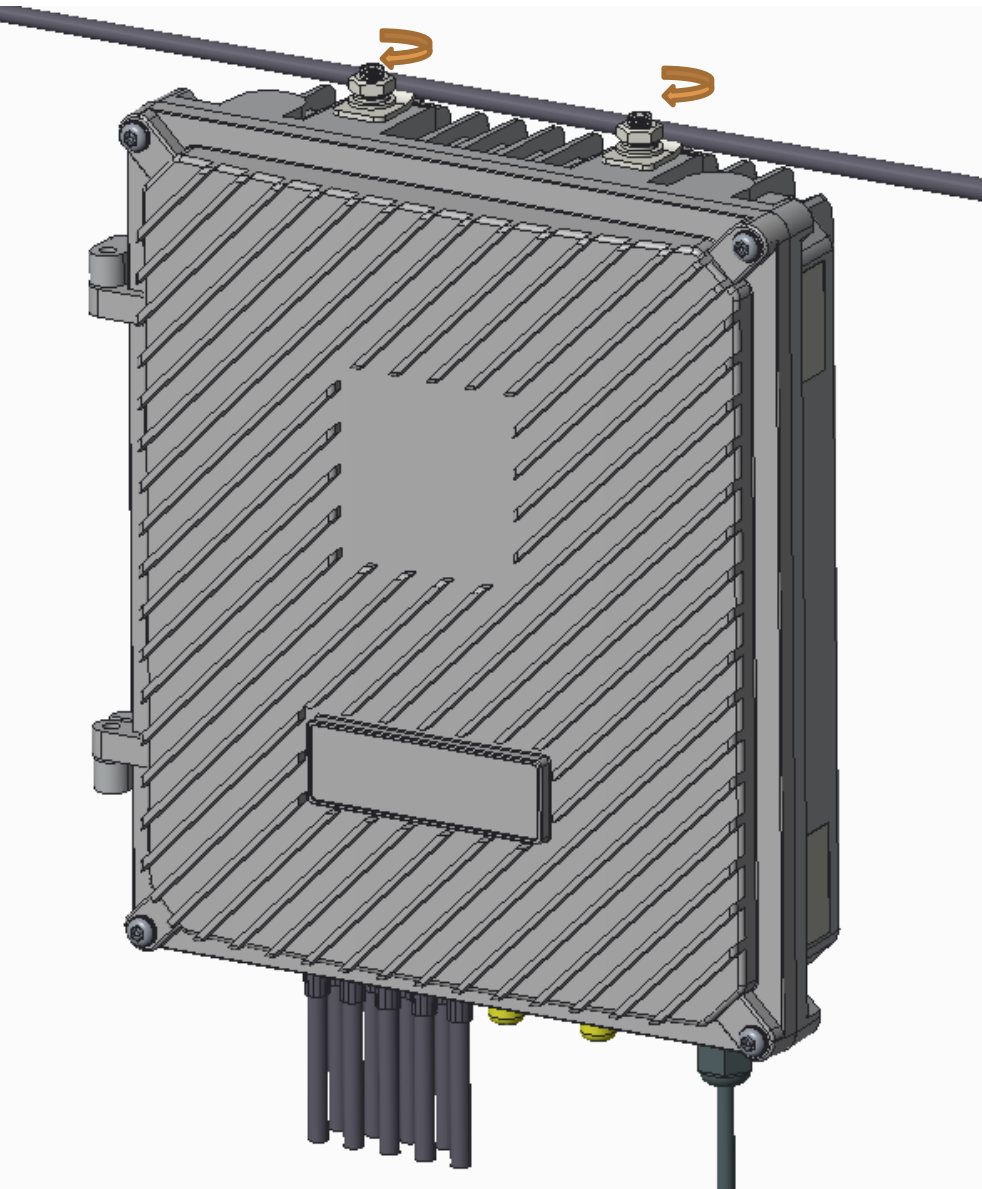
Aerial
1. Push the wire into the gap and hang the device on the wire.
2. Tighten the two mounting nuts to secure the unit to the wire.
Wiring instructions
Refer to the twisted pair or coax wiring instruction guide for details on how to connect your ReadyLink devices.
Mounting hardware
The mounting hardware includes a wall mount kit for standard standard backboards, dry wall, and building siding. When installing the device, make sure that there is sufficient space around the device to support an adequate fiber bend radius.