Deployment guide
How to deploy ReadyLinks devices, from staging and claiming them in ReadyView through firmware upgrades, provisioning with templates, and organizing them into networks.
This guide provides instructions on how to deploy ReadyLinks devices. The cloud architecture provides an incredibly powerful sandbox and staging area without the need to ever unbox a single piece of hardware. This is mainly because configuration changes and staging live in the cloud until the device they are destined for checks in. This provides a broad array of new opportunities for streamlining new switch deployments as well as switch refreshes.
#Before you begin
- Log in to readyview.io. If this is your first time, create a new account.
- Gather the devices you are planning to deploy.
- Locate an Internet uplink with access to a DHCP server and a power source for the devices.
- Verify your firewall rules allow the devices to communicate with your dashboard.
#Staging
Devices can be brought online and pre-provisioned prior to installation, or pull their configuration at the time of installation. Create a configuration template for each ReadyLinks device model and automatically apply the template to devices as they come online and are adopted into your organization.
#Bringing devices online
Here's how to bring your device online for the first time:
- Unbox your ReadyLinks device and power it on.
- Plug one of the WAN ports of the ReadyLinks device into an Internet gateway.
- Log in to readyview.io to claim your device.
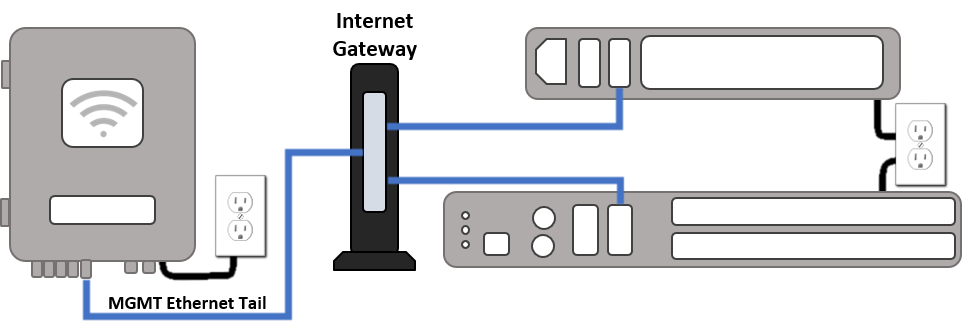

Each ReadyLinks device comes with a standard Ethernet uplink (WAN) facing port. Plug this port into your Internet gateway and follow the steps below to claim and manage your device.
#Claiming devices
- Log in to readyview.io using the account created earlier.
- Navigate to the Devices tab and select the + button to add a device or multiple devices.
- Provide the MAC address of your device(s). Either enter a comma-separated series of MAC addresses or scan the MAC QR code on your device.
- Select Claim to claim the device.
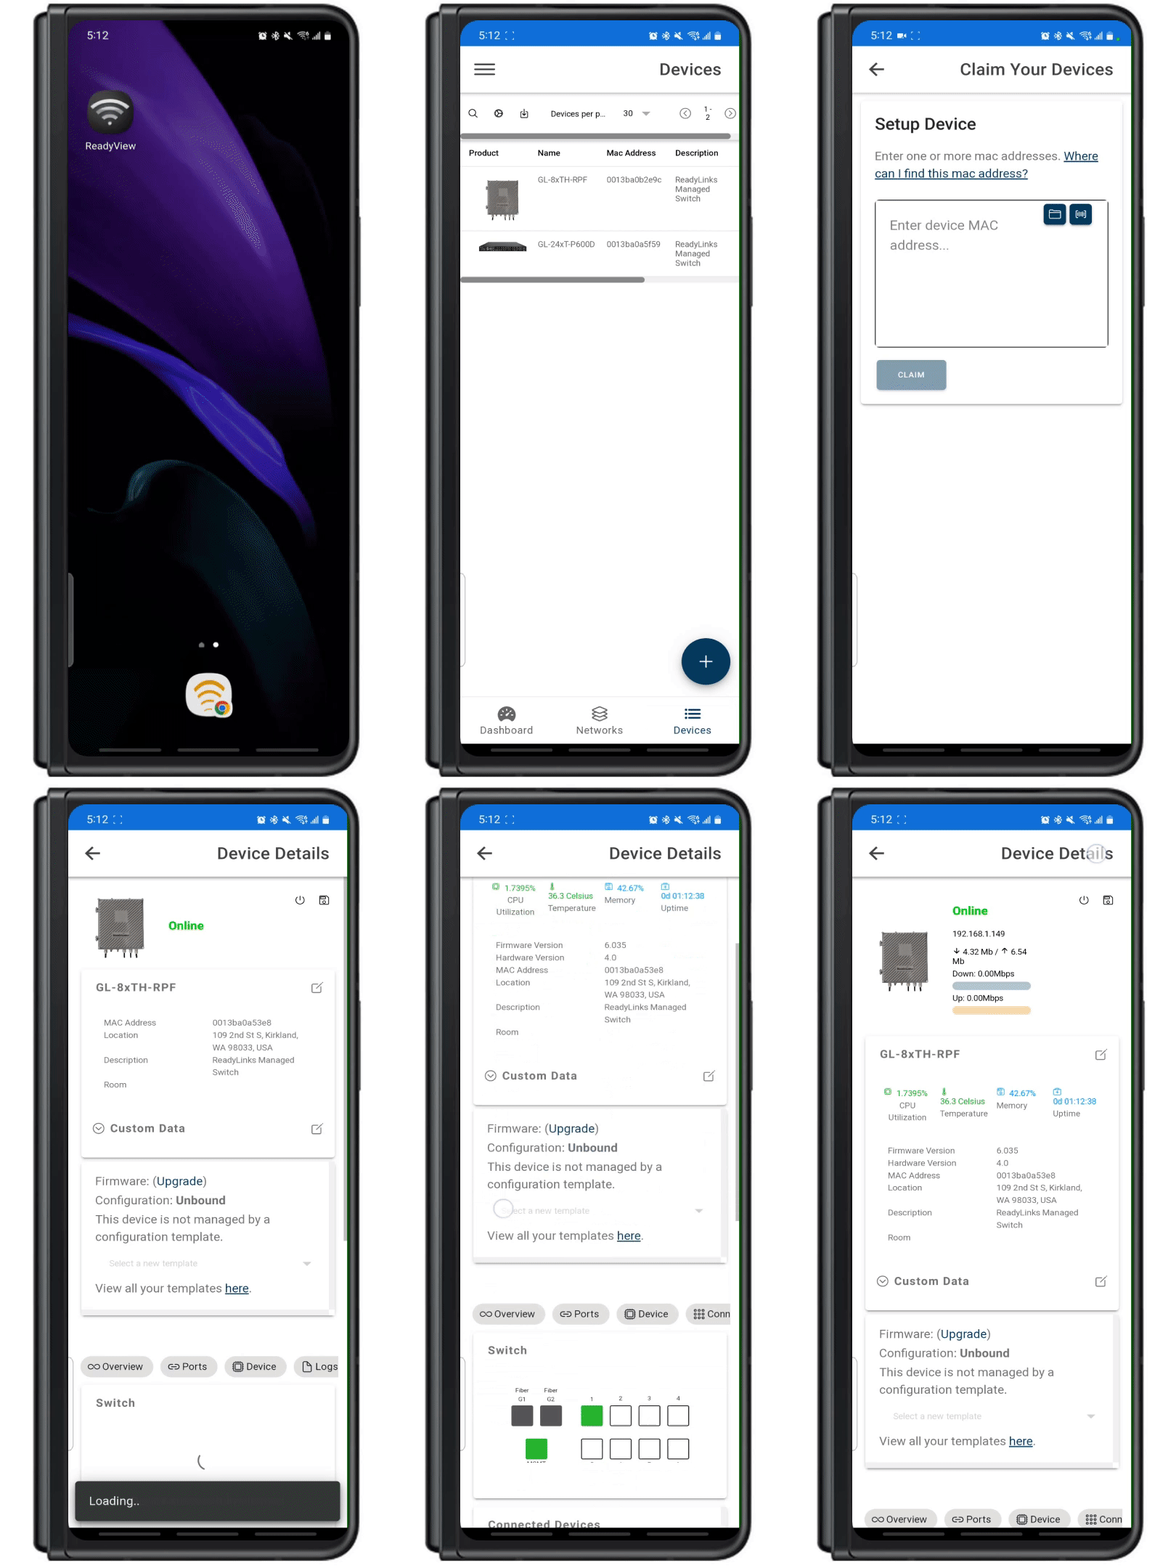
Congratulations! You've successfully claimed your ReadyLinks device.
#Firmware upgrades
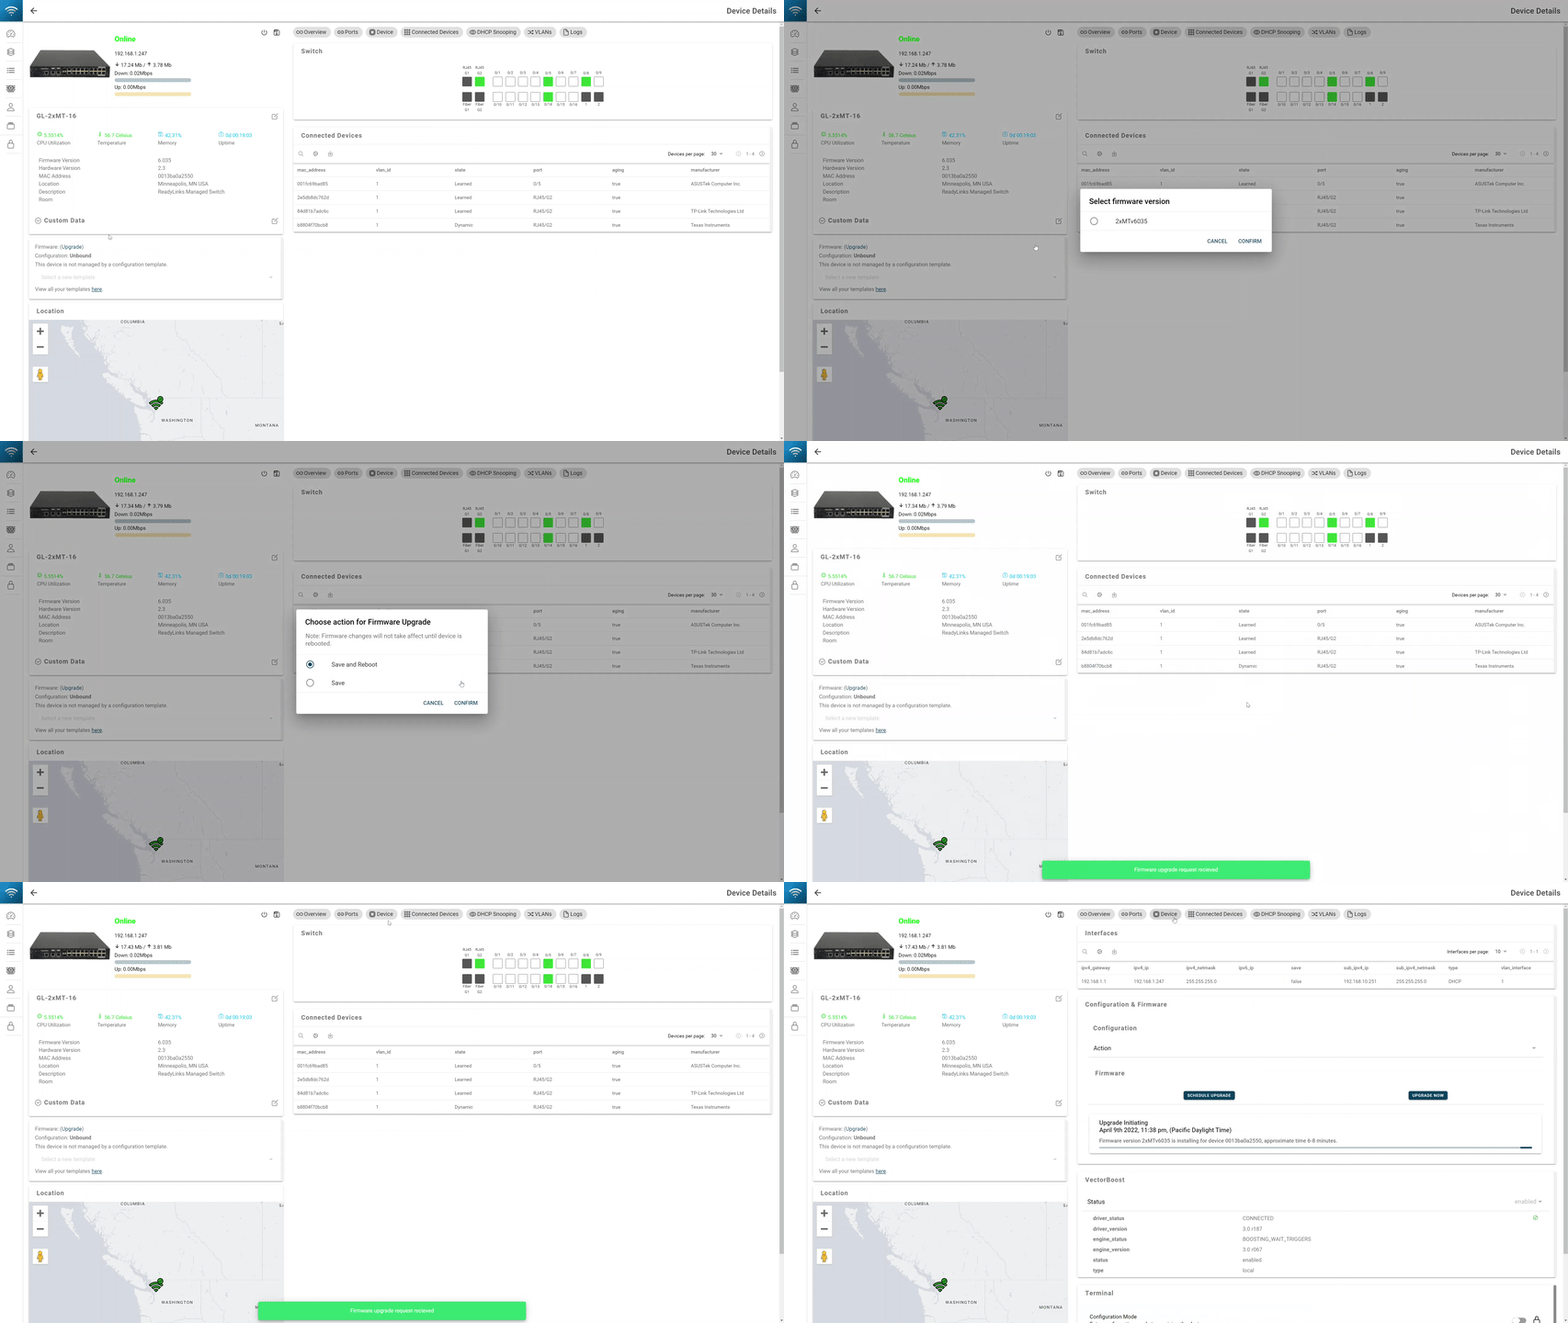
Now that you have your device claimed, you will want to upgrade it to the latest firmware version. Click into the device tab of your device page, select the upgrade now button, and choose the latest version. A firmware upgrade takes about 6-8 minutes and the device will reboot when the upgrade is complete. You can view the status of the upgrade at any time under the device tab.
#Provisioning
Upon claiming a device, you can bind a configuration template that will provision the device according to the template. The device will show a configuration status of Unbound while it is unprovisioned. Once the device has pulled its configuration, the configuration status will change to Up to date.
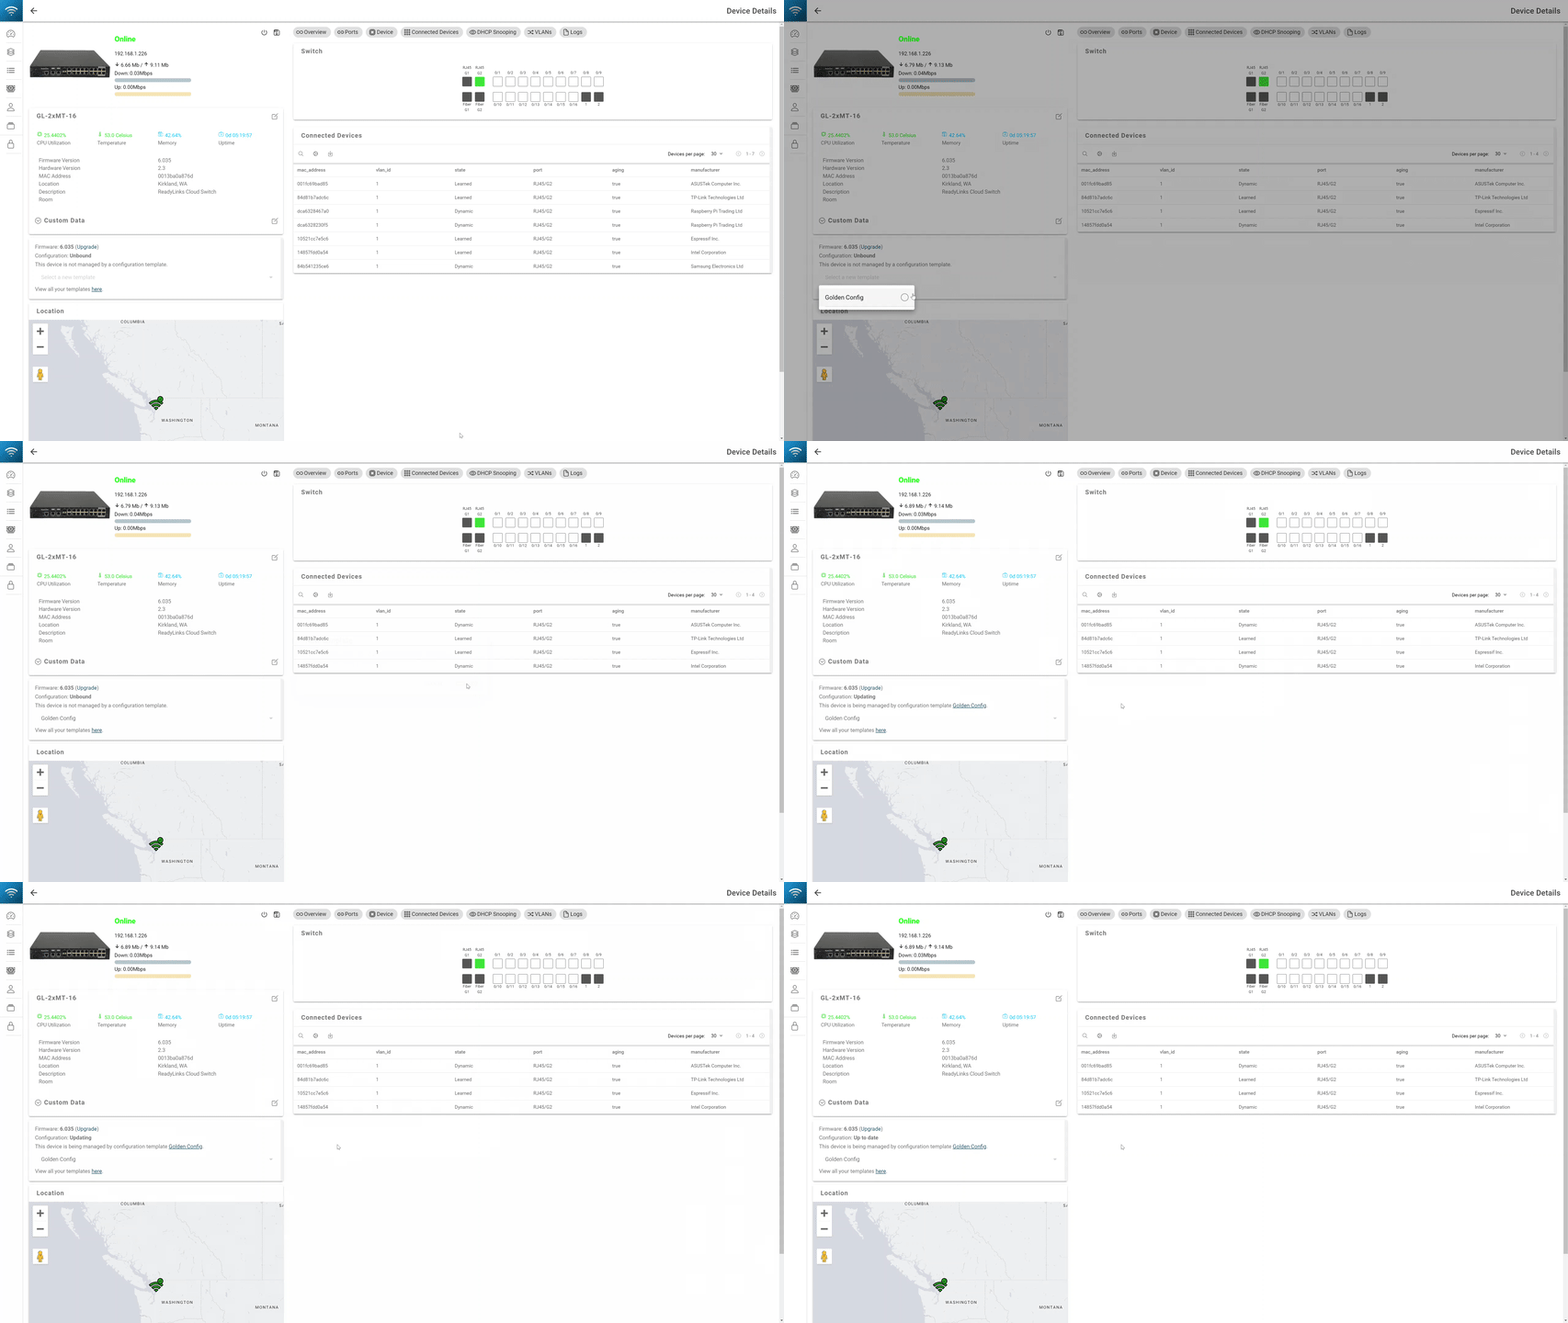
Learn more in Configuration templates.
#Create a network
Networks are used to geolocate and contain your devices and their configurations. You may create networks prior to receiving ReadyLinks devices.
- Log in to readyview.io using the account created earlier.
- Navigate to the Networks tab and select the + button to add a network.
- Search for the network's address and select it from the dropdown.
- Select Confirm to name and create the network.
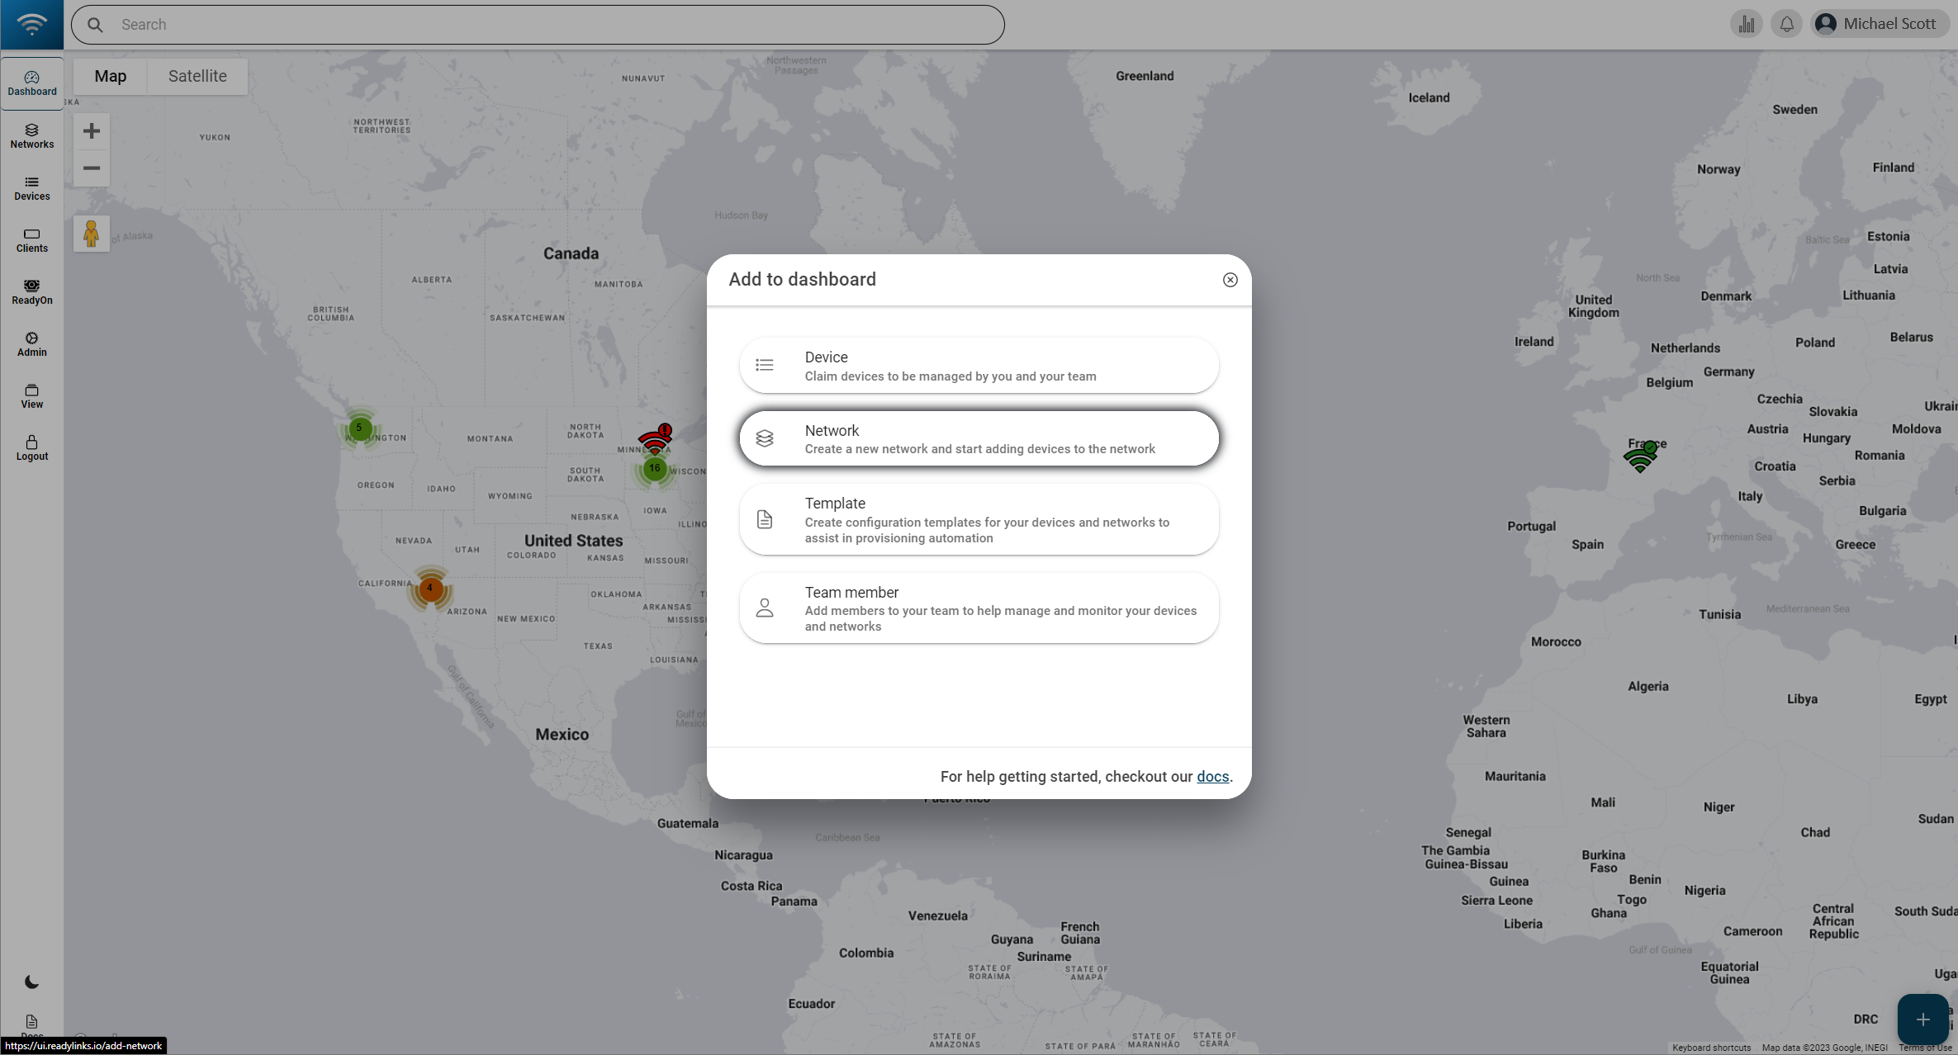
Congratulations! You've successfully created a network within your organization. Now you can add your devices to this network to manage and monitor them from your ReadyView dashboard:
- Navigate to your newly created network.
- Under the Devices tab in the network details page, click the + button.
- Add your devices to the network.
#Installation
Refer to the installation guides for installation instructions specific to each product.
Last updated May 5, 2023