Team and organization
Invite and manage your team, set up roles and single sign-on, and use the organization-wide Summary, Report, User Activity, account and support pages under Administration.
Administration holds everything that applies to your whole organization rather than one site: who has access, what they may do, organization settings, organization-wide reports, your own account, and support. Open it with the cog at the bottom of the left rail.
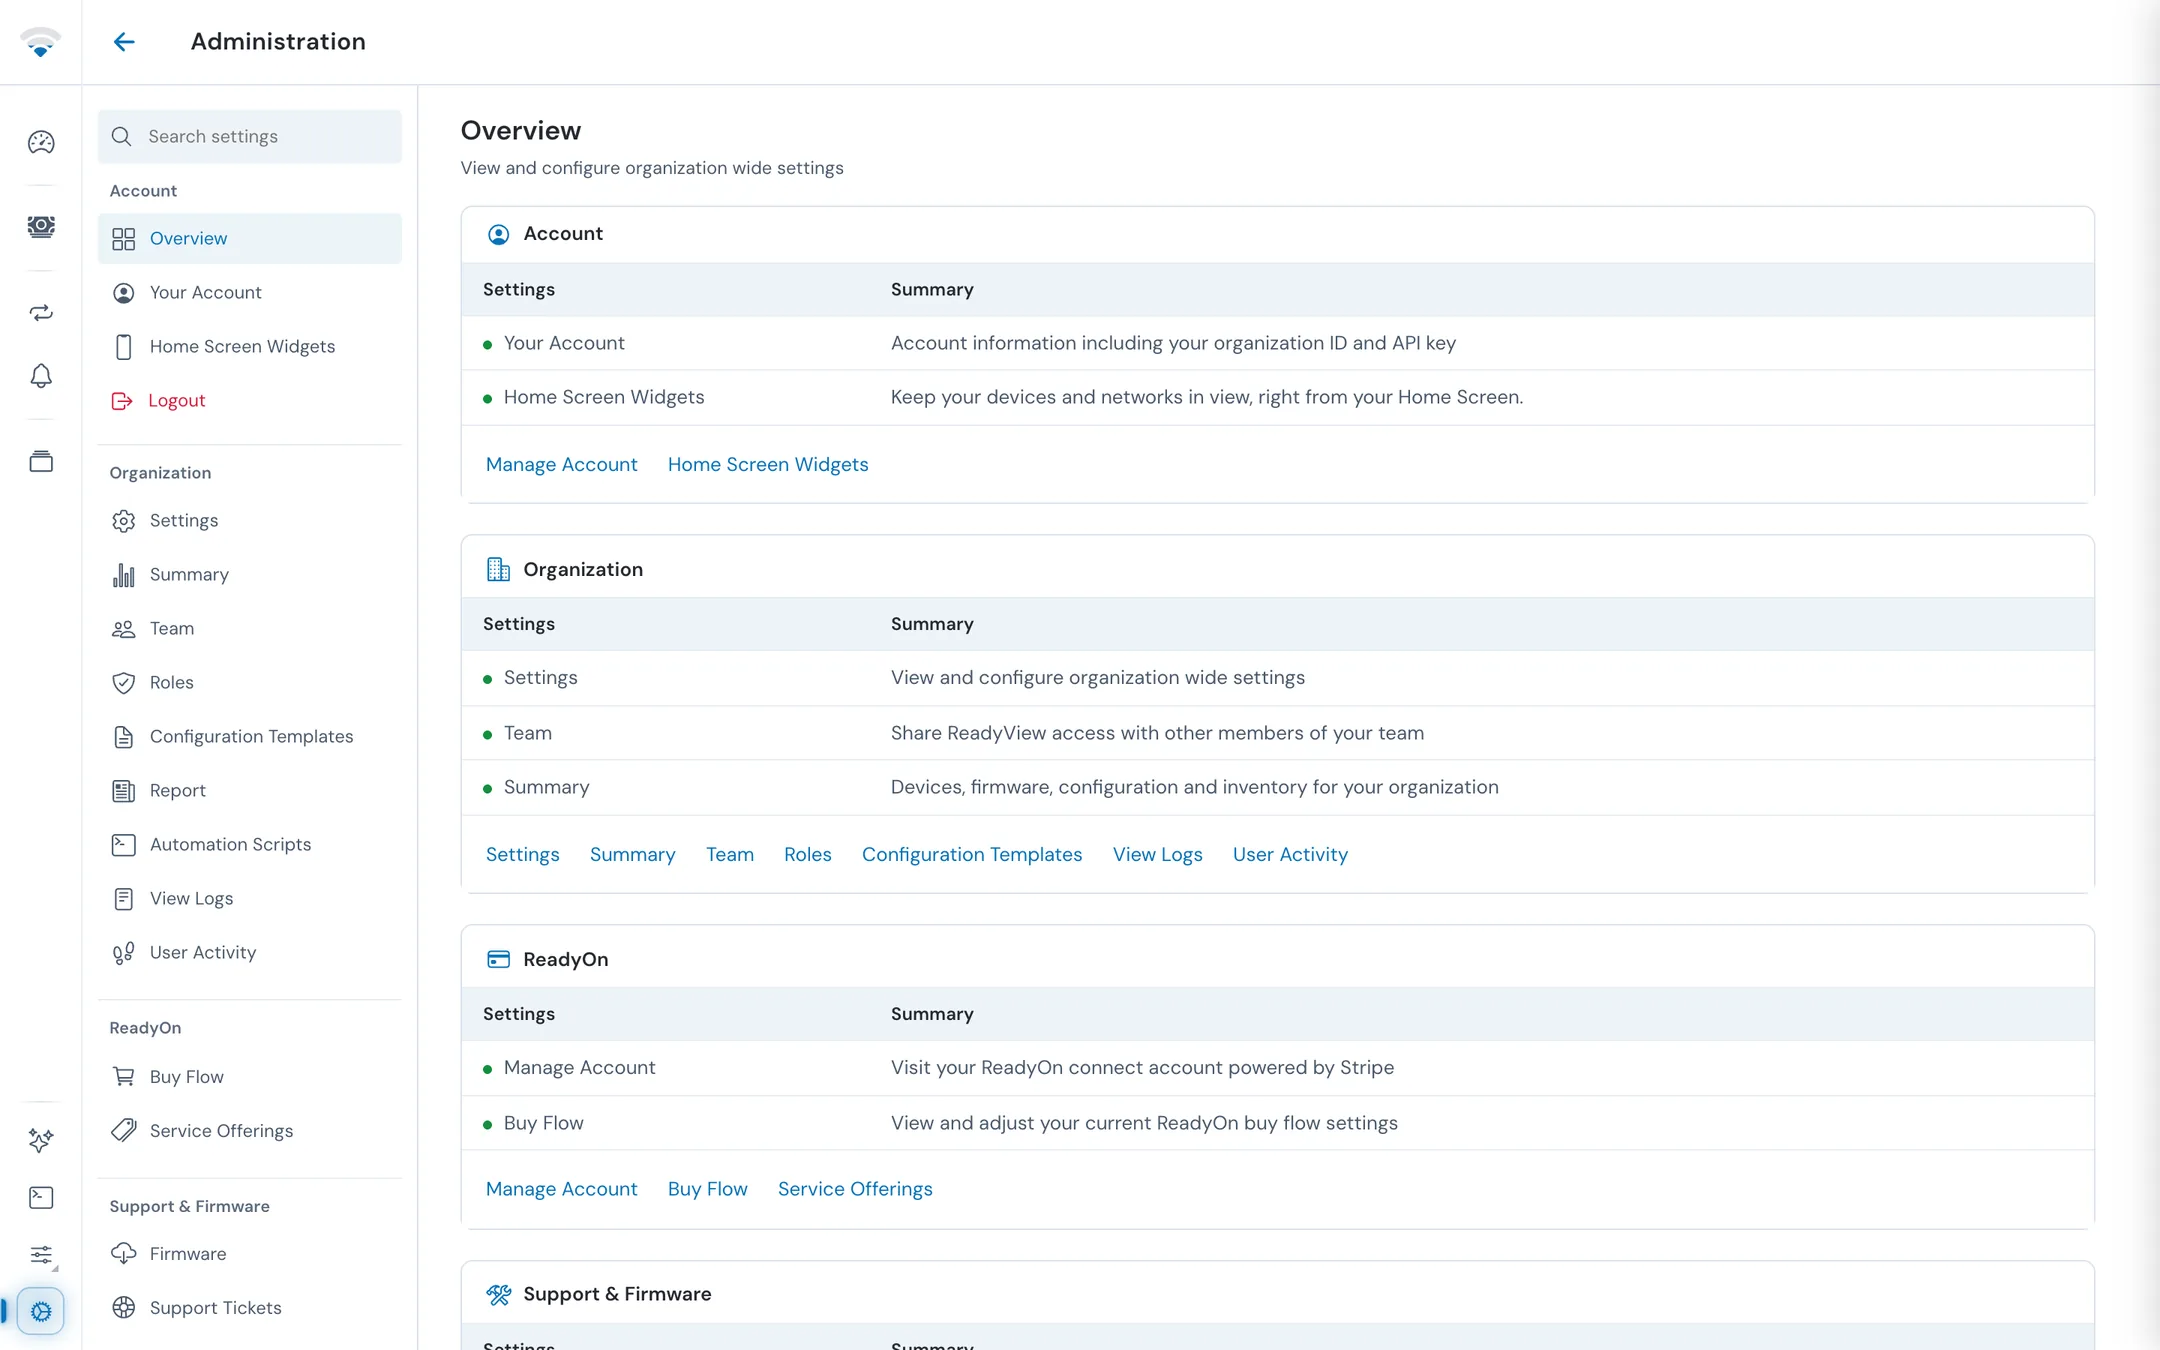
#Find your way around Administration
The side menu groups the pages. Use Search settings at the top of the menu to find a setting.
| Group | Pages |
|---|---|
| Account | Overview, Your Account, Home Screen Widgets, Logout |
| Organization | Settings, Summary, Team, Roles, Configuration Templates, Report, Automation Scripts, View Logs, User Activity |
| ReadyOn | Buy Flow, Service Offerings |
| Support & Firmware | Firmware, Support Tickets, RMA, Work Items, Documentation |
| General | About (the app version) |
Overview shows the same groups as cards with a short description and a button for each page. Some pages have their own guides: Configuration templates, Firmware, Automation Scripts, View Logs in Events and alerts, and ReadyOn in Subscriber management.
#Team
Team lists the members of your organization and the invitations you've sent. Administrators see the whole organization; other members see their own team.
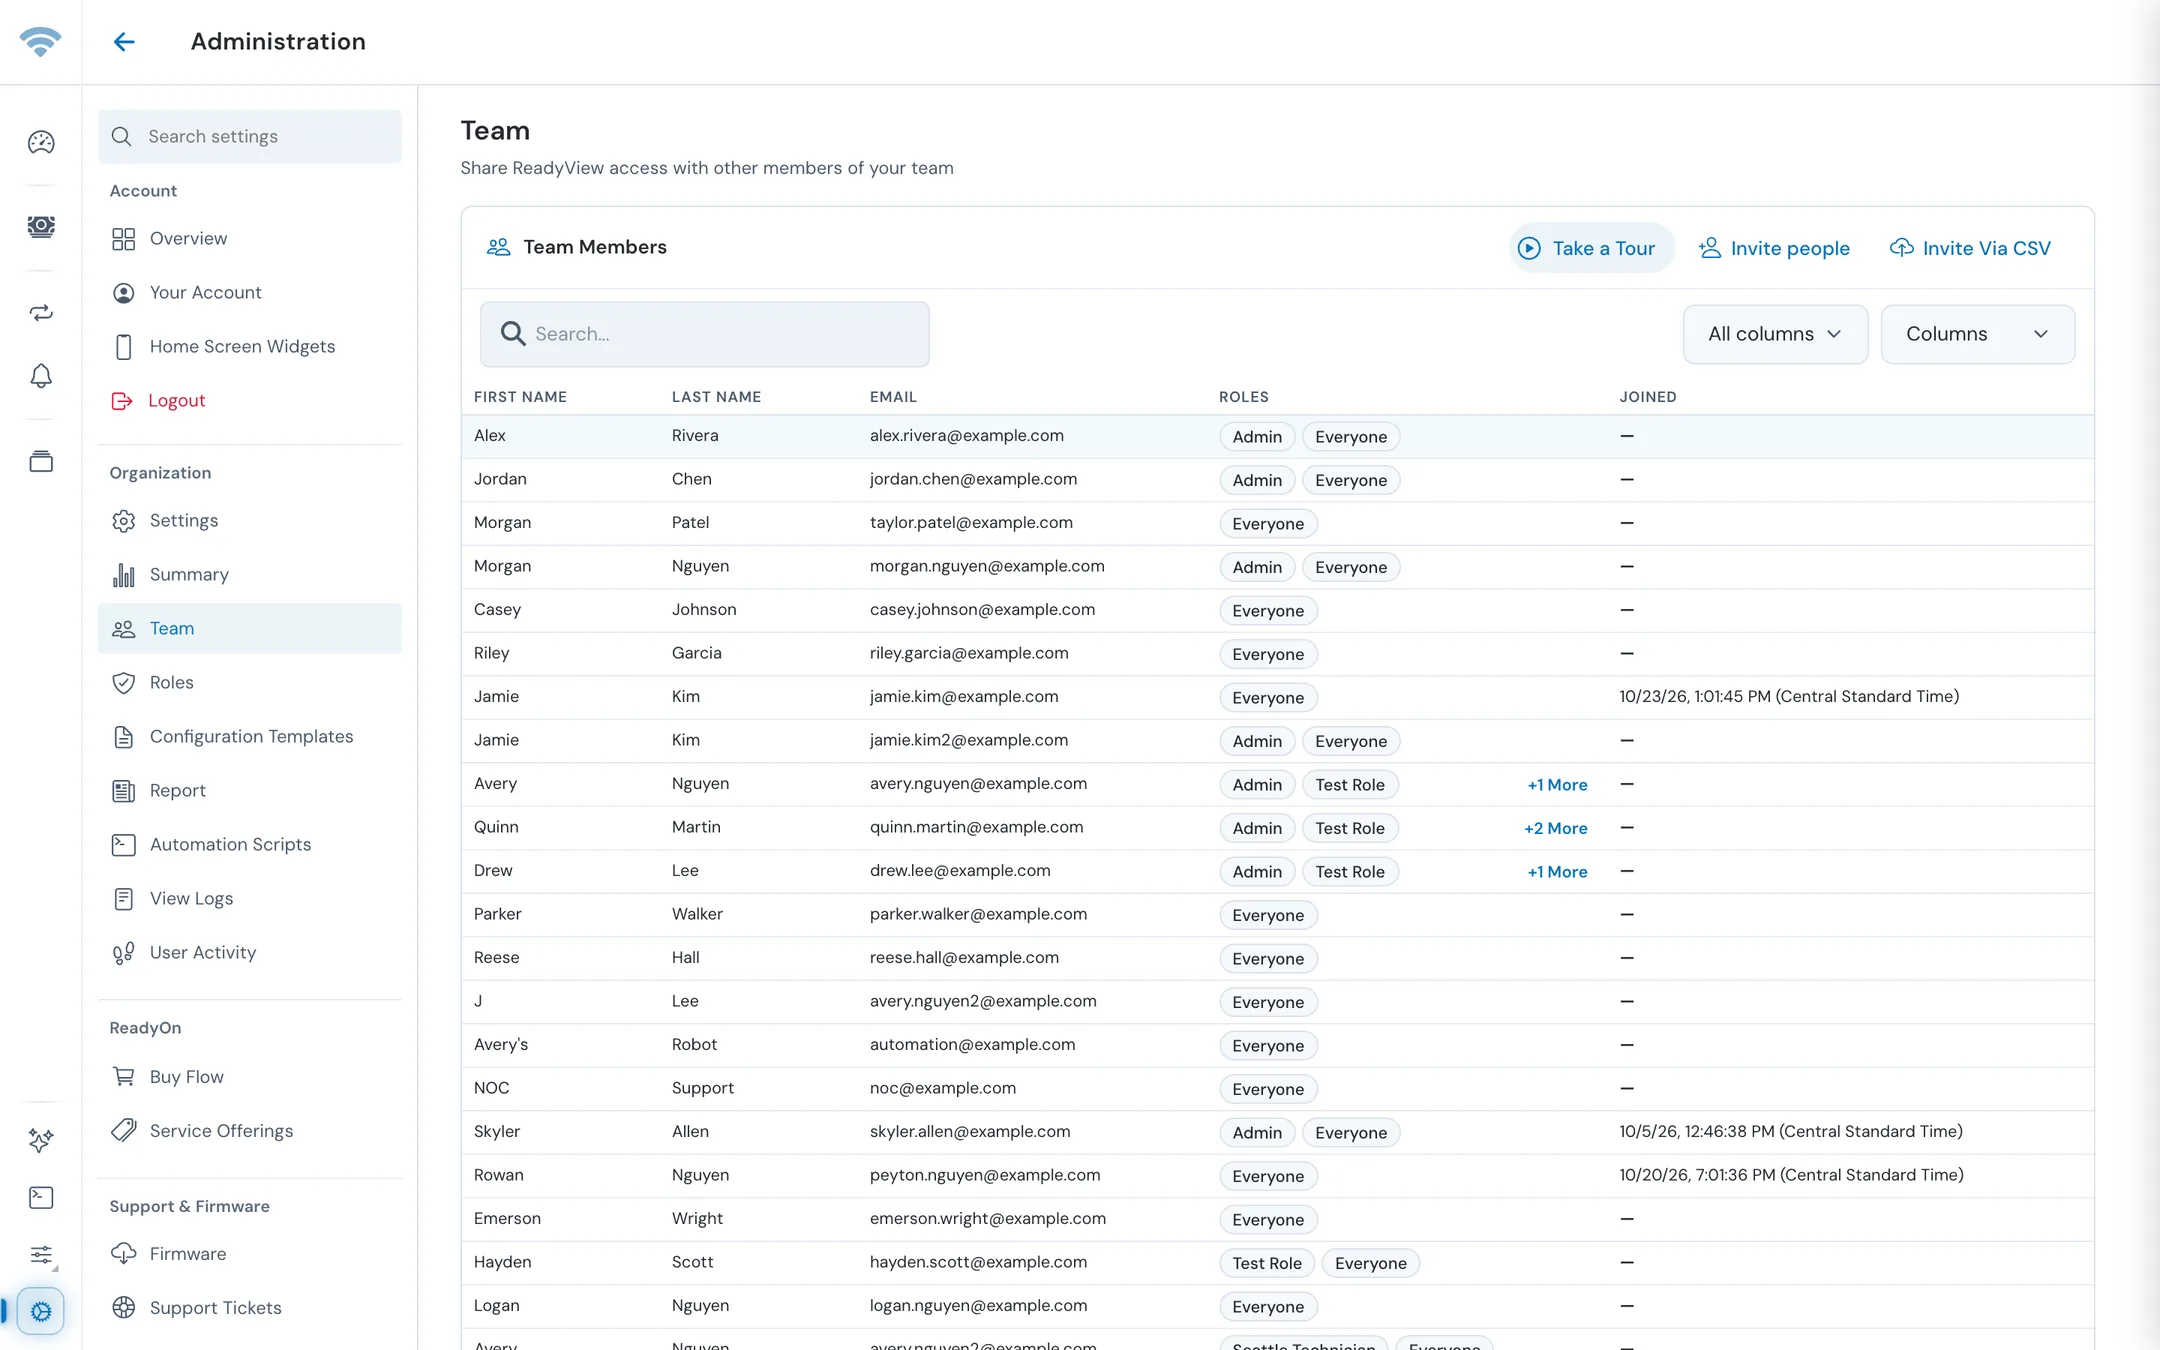
The Team Members table shows First Name, Last Name, Email, Roles and Joined. Every member also holds the Everyone role. Use Columns to choose what's shown. Take a Tour walks you through the page.
#Invite people
You need the Invite Organization User permission to invite.
- Click Invite people.
- In Email addresses, type an address and press Enter or a comma after each one. You can paste a list to add several at once.
- Under Roles on acceptance, tick the roles each person gets when they accept. Only roles you could assign yourself are listed.
- Pick when the link expires in Link expires: 24 hours, 7 days (the default), 30 days, or Custom… (from 5 minutes up to 180 days).
- Optionally add a Personal note (optional).
- Under How to deliver, choose:
- Send email: ReadyView emails each person an invitation link.
- Create link: no email is sent. You get a link per person to copy, share, text, email from your own mail app, or show as a QR code.
- Click Send invitations or Create links.
#Invite from a CSV file
- Click Invite Via CSV.
- Click Download template. The template's header row is
user,team,organization,emails,expires. - Fill in one invitation per row. The emails cell can hold several addresses separated by commas; a spreadsheet app puts the cell in quotes for you.
- Click Choose CSV file, pick your file, then click Upload.
Only .csv files are accepted. If a row has a problem, the message names the row and the field. When the file is accepted you see "Team members invited successfully", and the invitations are sent in the background.
#Manage pending invitations
Pending Invites lists the invitations you've sent, with Invitee, Invited by, Roles, Status, Created and Expires. It shows pending invitations only; click Show all to include expired, revoked and accepted ones.
Click an invitation to:
- Edit invitation: change its expiry or roles. The link stays the same.
- Resend email.
- Revoke invitation: the link stops working immediately. You can always send a new invitation.
#Approve access requests
When someone signs up and names a member of your organization as their contact, the request appears under Access requests. This card is shown to people who can invite.
- Click Review on the request.
- Check the requester, the member they named, when they asked, and whether their email address is verified.
- Tick the roles they should get.
- Click Approve and add, or Decline.
Approving adds the person right away and emails them. Declining sends nothing.
#Change a member's roles or remove them
Click a member to open their details. Depending on your role you can:
- open User Activity for that member;
- Change role: tick the roles this person should hold;
- resend the verification email, if they haven't verified their address yet;
- Remove from team or Remove from organization. Removing someone from the organization takes away their access right away. If your organization uses single sign-on, they can't sign in through it again until you invite them.
On your own entry the same buttons read Leave team and Leave organization. Leaving the organization signs you out.
#Roles
A role is a set of permissions. Every member has the Everyone role, whose permissions apply to all organization members, plus any roles you assign.
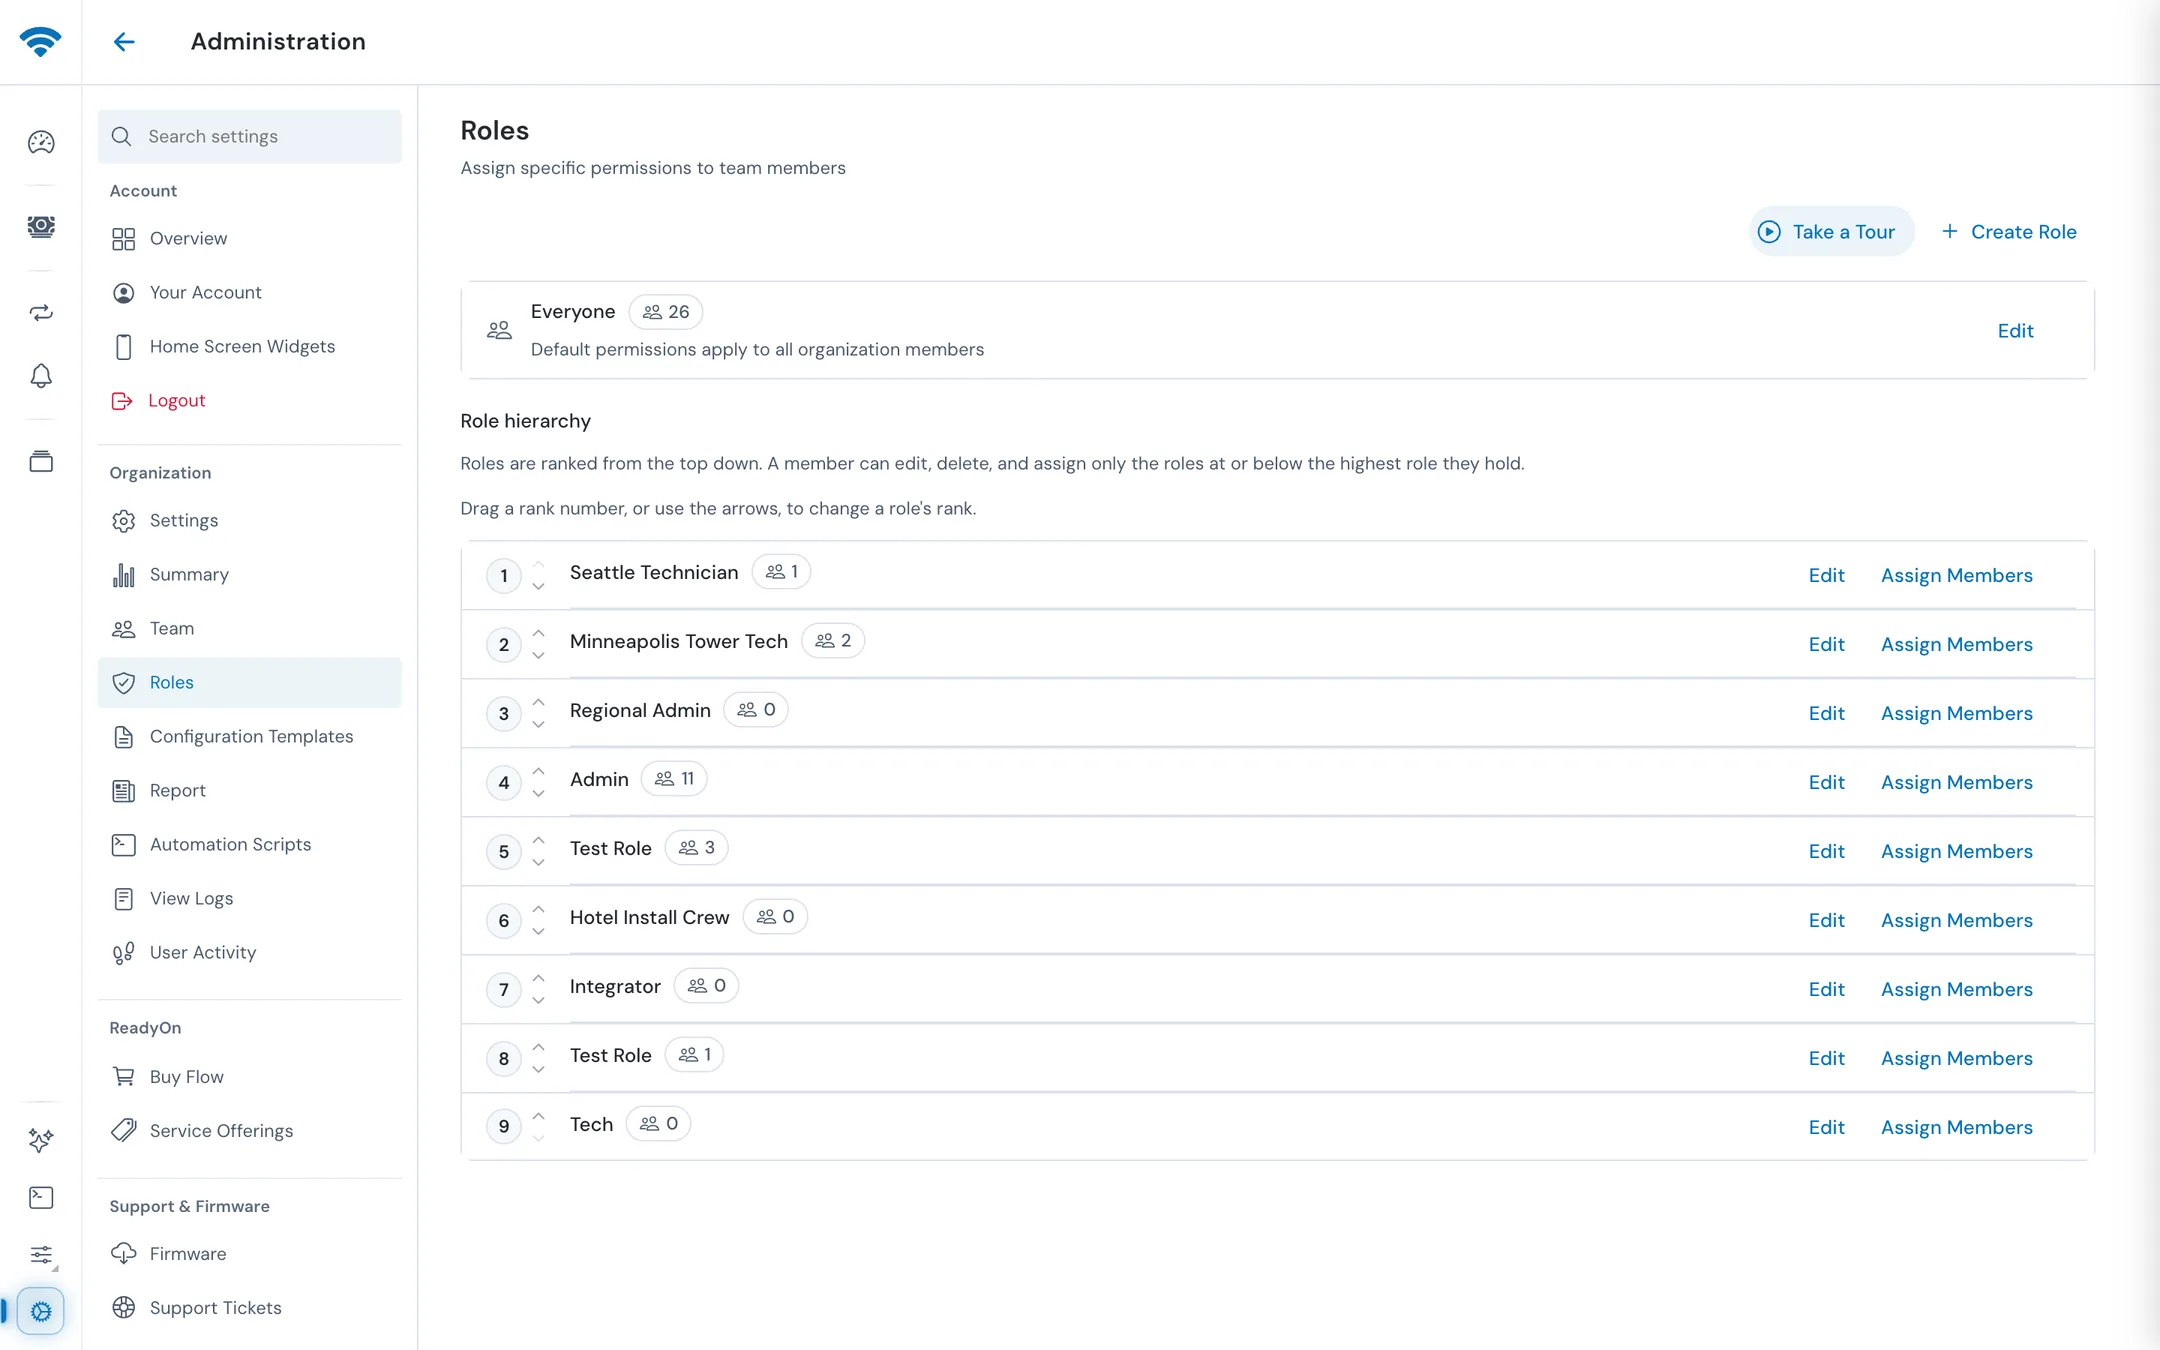
- Create Role adds a role. Edit changes a role's permissions, and Assign Members adds people to it.
- Under Role hierarchy, roles are ranked from the top down. A member can edit, delete and assign only the roles at or below the highest role they hold. Drag a rank number, or use the arrows, to change a role's rank.
For what each permission allows, see Roles and permissions.
#Organization settings
Settings holds the organization's name and single sign-on.
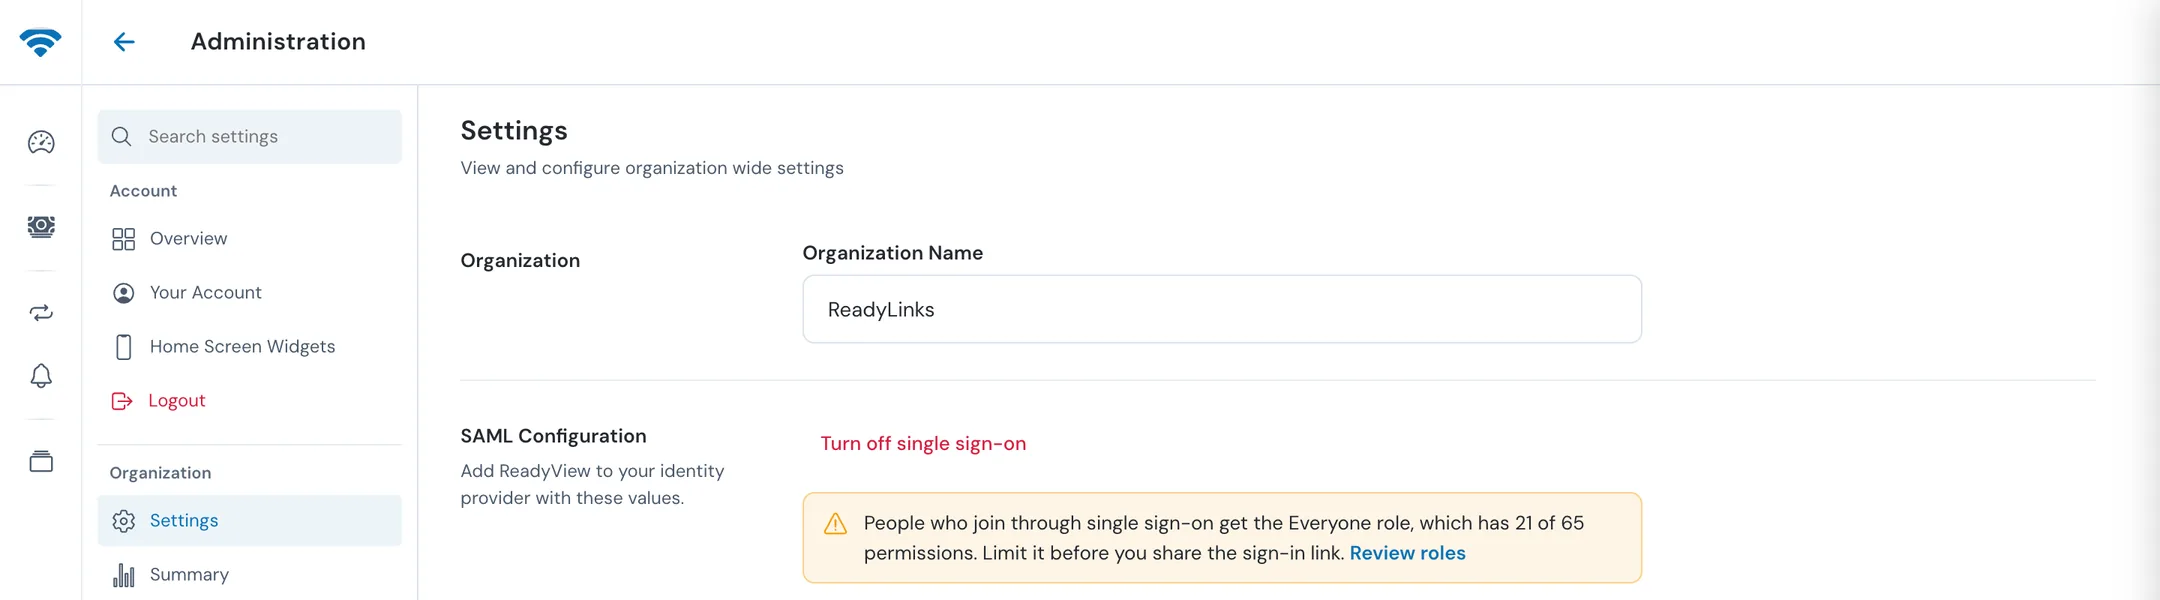
- Organization Name: changing it needs the Update Organization Settings permission.
- SAML Configuration: add ReadyView to your identity provider. Click Enable SAML if single sign-on is off. Copy Identifier, Reply URL and Sign-on URL into the provider; Name ID is the user's email address. Enter the provider's Entity ID, SSO URL and Certificate (X.509), then click Apply Changes. Turning single sign-on on or off needs the Manage SAML Configuration permission.
The Sign-on URL is also your team's sign-in link: it opens your organization's single sign-on without asking for the organization ID.
For a step-by-step setup with your identity provider, see Single sign-on. Alert settings have moved: the Notifications card on this page links to them (Open Notifications). See Events and alerts.
#Summary
Summary (headed Analytics on the page) shows the state of every device in your organization in one place. Drag a card by its handle to reorder the cards.
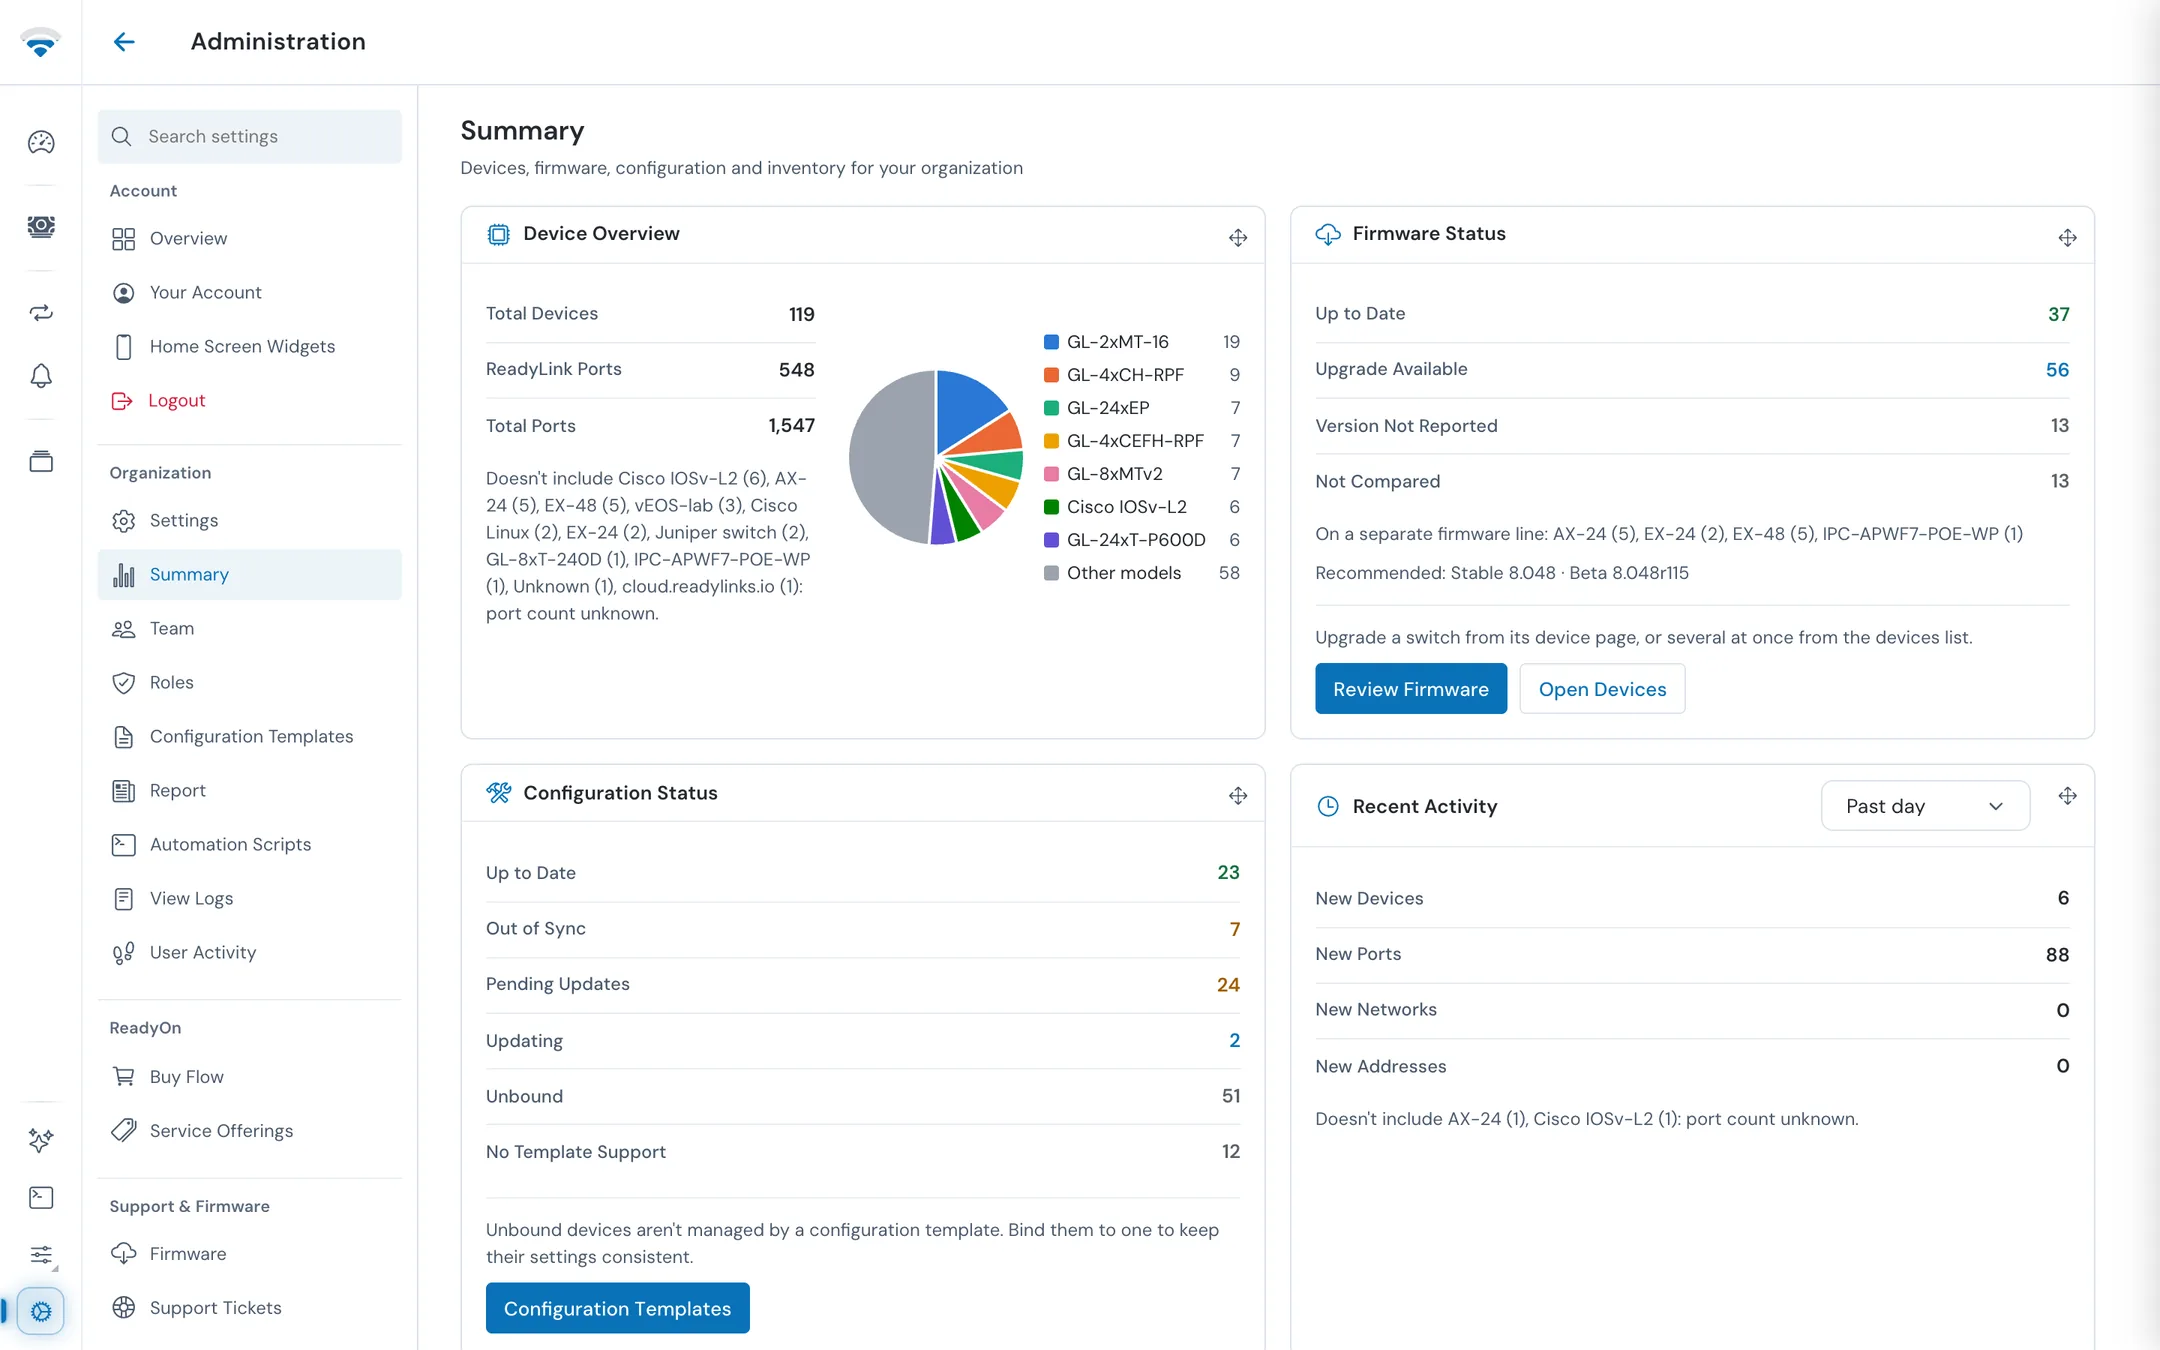
| Card | What it shows |
|---|---|
| Device Overview | Total Devices, ReadyLink Ports, Total Ports, and a chart of devices by model. Models whose port count isn't known are listed underneath |
| Firmware Status | Devices Up to Date, with Upgrade Available, Version Not Reported, or Not Compared (on a separate firmware line), and the recommended stable and beta versions. Review Firmware and Open Devices take you to the fix |
| Configuration Status | Devices Up to Date, Out of Sync, Pending Updates, Updating, Unbound (not managed by a template) and No Template Support. Configuration Templates opens the templates |
| Recent Activity | New Devices, New Ports, New Networks and New Addresses over the Past day, Past 7 days, Past 30 days, Past 90 days, or a custom start date |
Further cards cover ReadyOn figures, Inventory, Installation History, the Firewall security summary (see ReadyWall firewalls) and Top Networks. To act on firmware or template results, see Firmware and Configuration templates.
#Report
Report builds one PDF across any of your networks. For a single site, use Report in the site's settings instead (see Site settings).
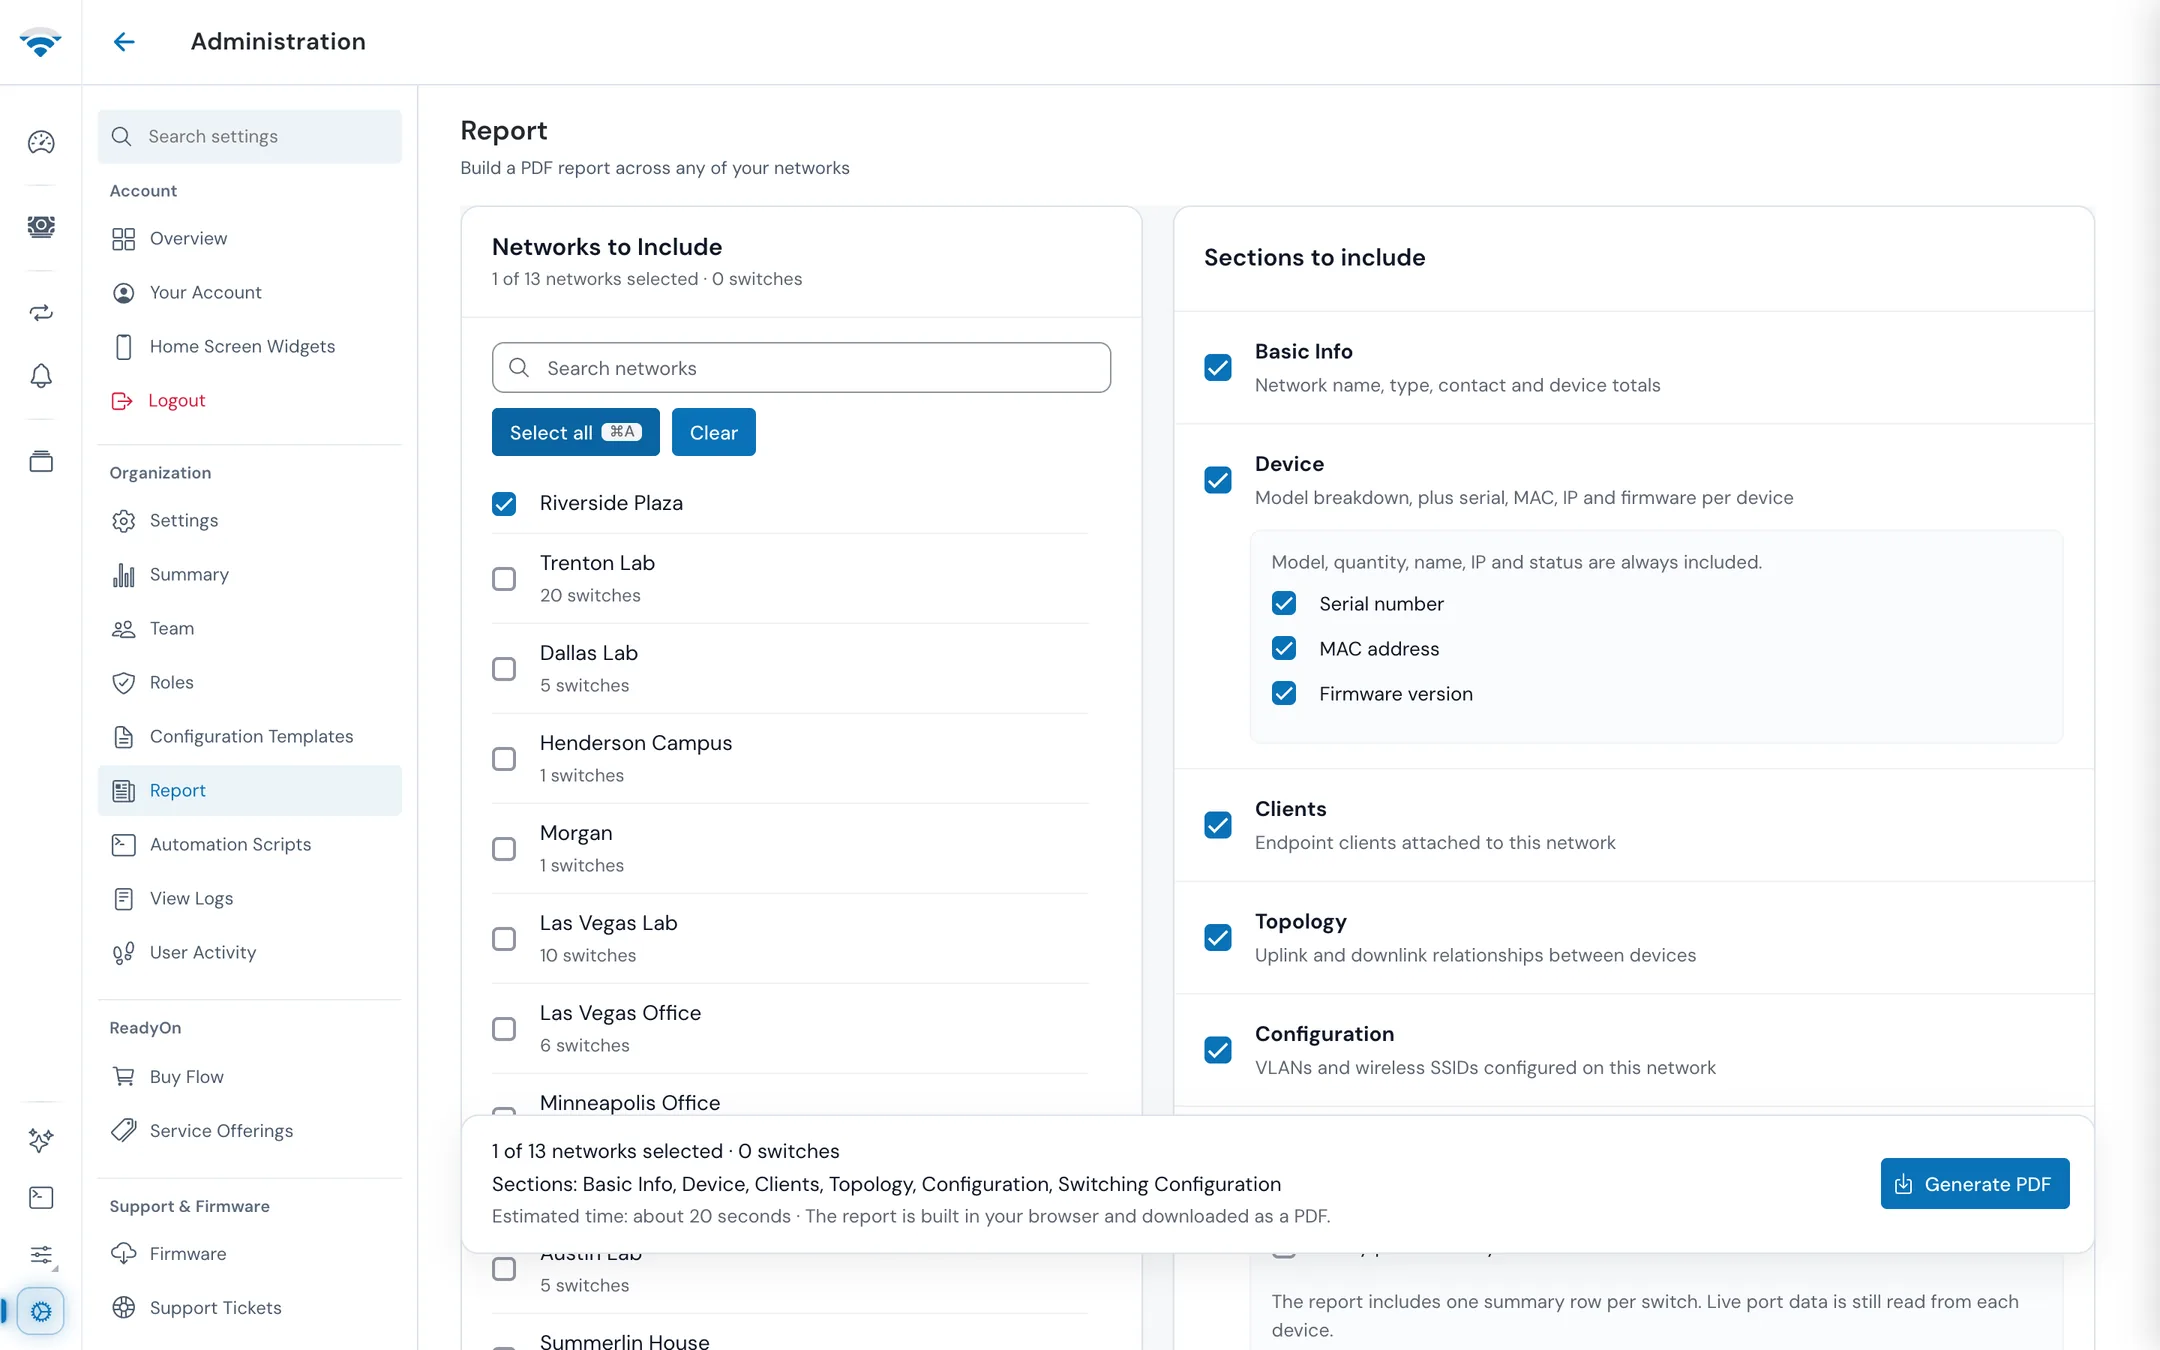
- Under Networks to Include, tick the networks. Search networks, Select all and Clear help with long lists.
- Under Sections to include, tick the sections you want. They're described below.
- Check the Estimated time and click Generate PDF.
| Section | Contents |
|---|---|
| Basic Info | Network name, type, contact and device totals |
| Device | Model breakdown. Model, quantity, name, IP and status are always included; tick Serial number, MAC address or Firmware version to add them |
| Clients | Endpoint clients attached to the network |
| Topology | Uplink and downlink relationships between devices |
| Configuration | VLANs and wireless SSIDs configured on the network |
| Switching Configuration | Port status, VLAN and PoE for each switch. Every port on every switch lists each port; off, you get one summary row per switch |
Live port data is read from each switch, so a report with many switches takes a while; with Every port on every switch on, allow up to 30 seconds per switch. ReadyView warns you before a long run. The report is built in your browser and downloaded as a PDF, so keep the tab open until it finishes.
#User Activity
User Activity shows everything one member has done: every change they made and every log entry that names them, newest first. You need the View User Activity permission.
- Choose a person under Member.
- Narrow the list with Show (Everything, Changes or Log entries), Search, or Failed only.
- Open an entry to see when it happened, what was submitted, the response, and the IP address and client it came from.
- Click Load older activity to go further back, or Download CSV to keep a copy.
Changes are recorded from the moment this feature was turned on, so older activity may be missing.
#Your account
Your Account holds your own settings:
| Section | What's there |
|---|---|
| Profile | Your Name and email, and the New dashboard switch (the page reloads when you change it) |
| Preferences | Language, Measurement system, Temperature unit and Distance unit |
| Roles | The roles assigned to you in this organization |
| Organization Details | Your ReadyOn ID, the organization ID and your API key, and Create Organization |
| Security | Multi-factor Authentication, Passkeys (when your browser supports them), Password (Reset) and Logout |
| Connected apps | Apps connected through the ReadyView MCP server, such as Claude. See Connect your own tools |
| Danger Zone | Delete Organization, which permanently deletes the organization and all its data. Needs the Delete Organization permission |
Home Screen Widgets lets you build and preview widgets (such as Network Health, Critical Devices or Port Watch) and save them to your account. To place a saved widget on a phone or tablet Home Screen, open ReadyView on that device.
Logout signs you out.
#Support and returns
| Page | Use it to |
|---|---|
| Support Tickets | See your tickets and replies, or click New Request to open one |
| RMA | Return faulty hardware under warranty: click New Returns Request, pick the devices, choose an Issue Category, describe the problem, then Submit RMA Request |
| Work Items | Report bugs, ask for features and ask questions across ReadyLinks products. Share an item on the public board, or send it privately to the ReadyLinks team |
| Documentation | Open the product guides and the Help Center |
See Troubleshooting for what to include in a ticket.
#Related guides
Roles and permissions
What each permission allows and how to plan your roles.
Single sign-on
Connect ReadyView to your identity provider with SAML.
AI Assistant and automation
The Network Assistant, routines, Automation Scripts and the Terminal.
Troubleshooting
Find what changed, and get help from ReadyLinks.
Last updated November 10, 2026