Adding devices
Claim switches, access points, and other ReadyLinks devices into a site by MAC address, by QR code, or from a CSV file.
Before ReadyView can show or manage a device, you claim it: you tell ReadyView which site the device belongs to. You can claim one device at a time by MAC address or QR code, or many at once from a CSV file. ReadyView works out what kind of device it is from its MAC address.
#Before you start
- Find the MAC address. It's on the device's label, often with a QR code.
- Connect the device. A device can only be claimed once it has reached ReadyLinks over the internet. If something upstream filters outbound traffic, allow it as described in Firewall rules for cloud connectivity.
- Check your role. Your role needs permission to claim that kind of device. See Roles and permissions.
- Create the site first if it doesn't exist yet. See Create a site.
#Open the claim page
- Open the site you're adding the device to.
- Click Add Device in the top bar.
- In Select Device Type, choose the kind of device:
| Option | For |
|---|---|
| Wired Devices | Switches and DPUs |
| Wireless Devices | Access Points |
| Power Devices | Smart Plugs |
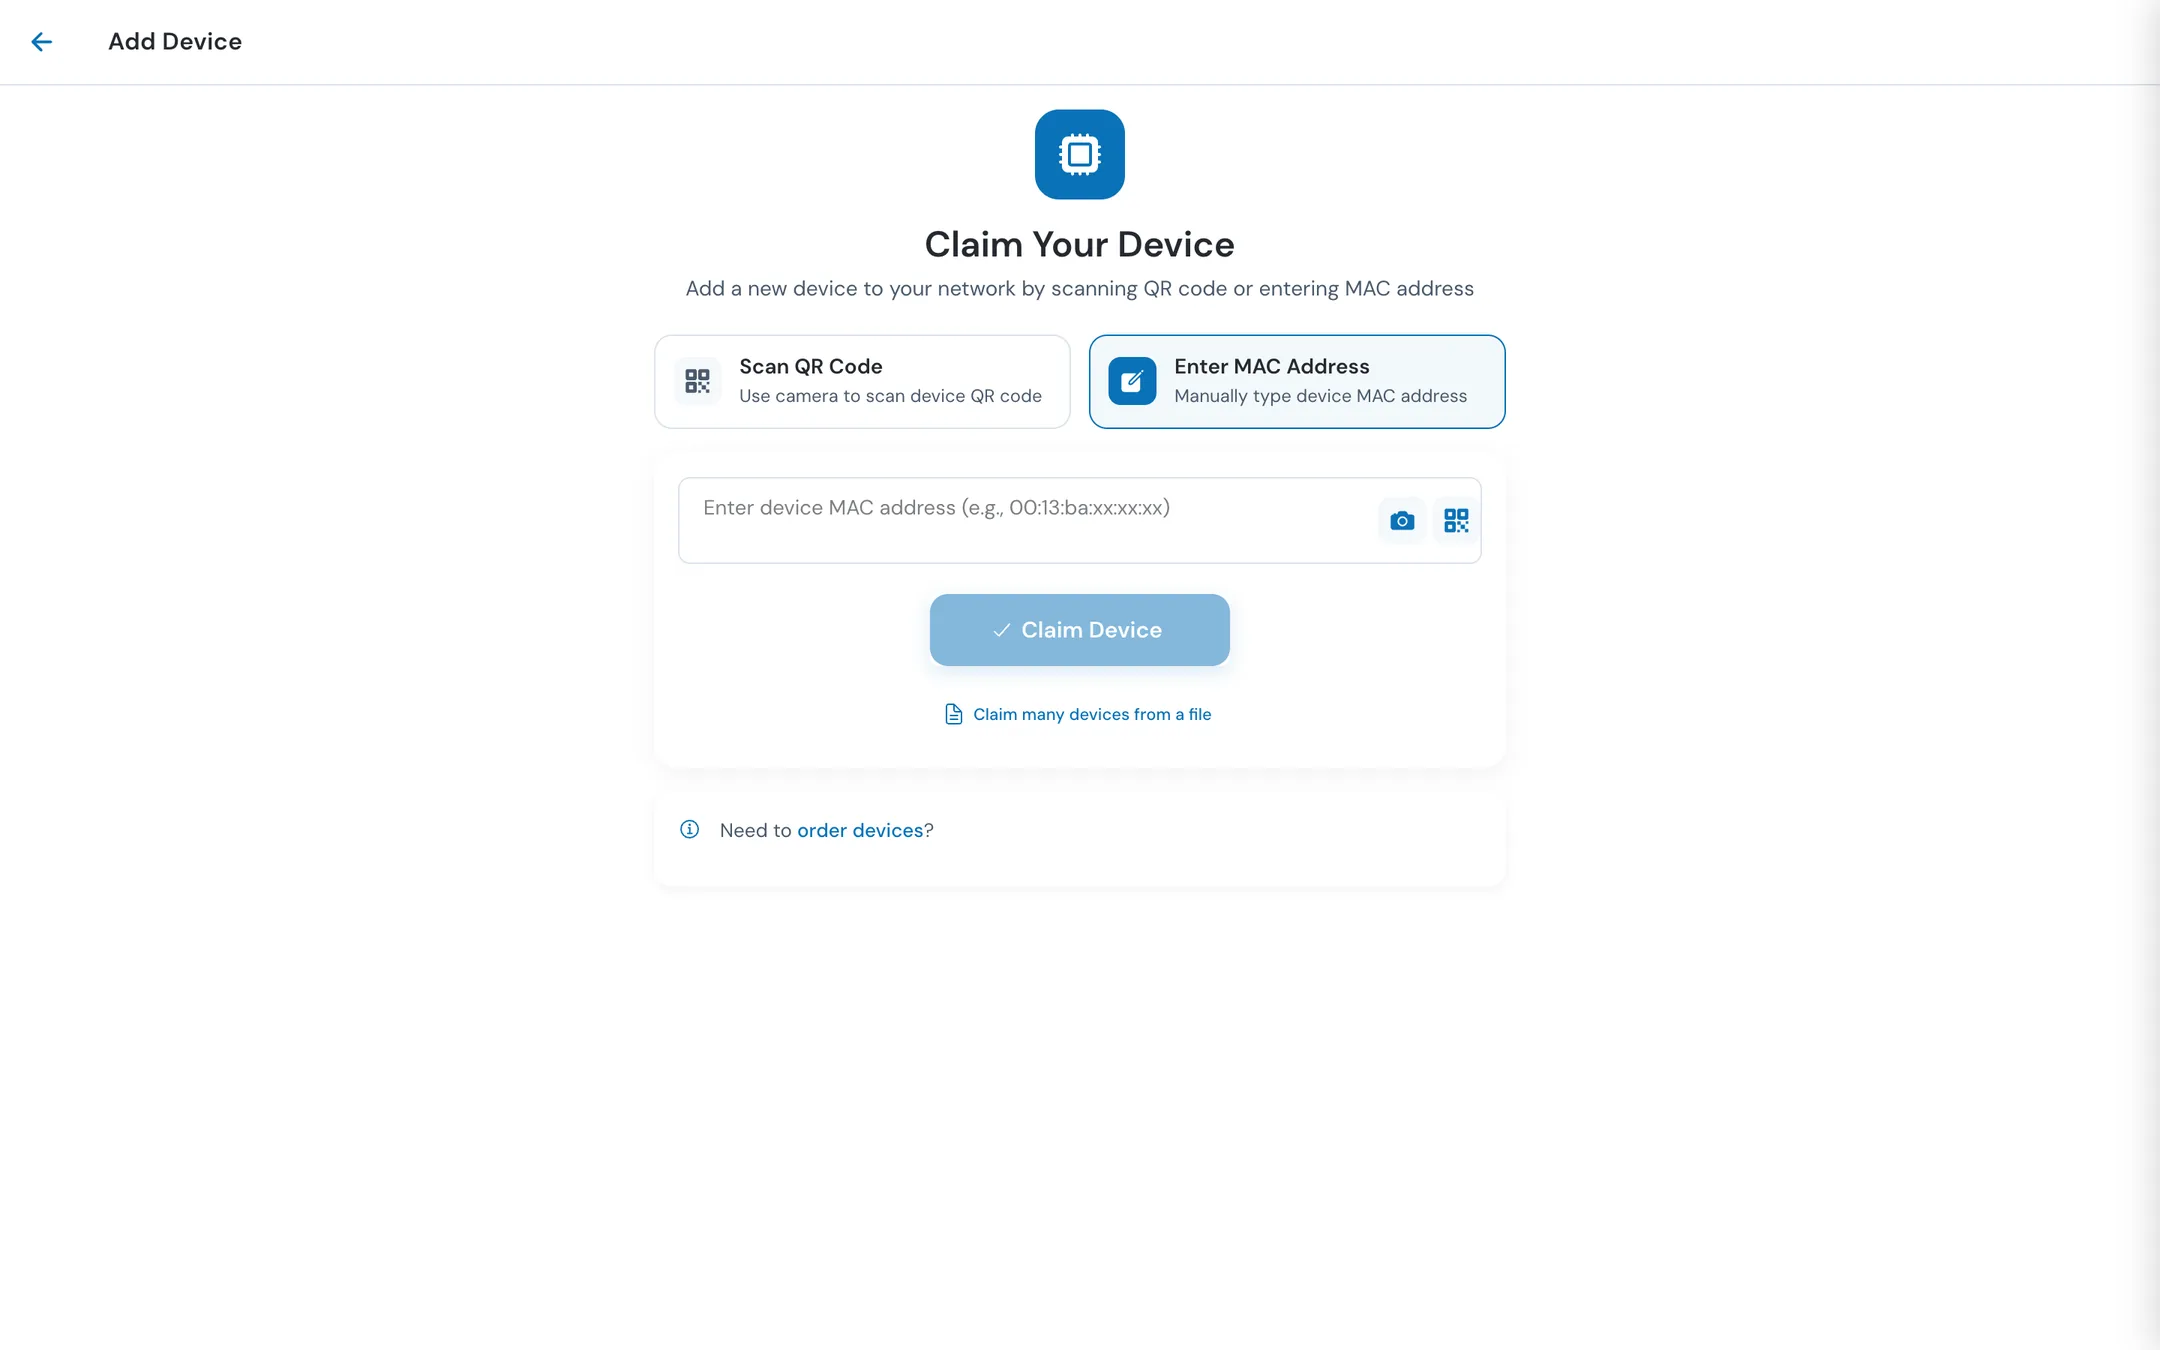
Wired Devices and Wireless Devices both open Claim Your Device. A chip at the top, Adding to and the site's name, shows where the device will go. Power Devices opens Smart Plug Provisioning instead, which this page doesn't cover.
If you open the claim page without starting from a site, ReadyView asks you to pick the site in a Select Network list before it claims anything.
#Claim a device by MAC address
- On Claim Your Device, choose Enter MAC Address. In a desktop browser it's already selected.
- Type the MAC address, for example
00:13:ba:12:34:56. Colons, dashes, and capitals don't matter. To claim several devices, separate their MAC addresses with commas. - Click Claim Device.
- Fill in the claim form for the device (see below), then click Claim Device.
If you entered several MAC addresses, the form repeats for each one and shows how far through you are, for example "2 of 5". Click Cancel on a form to skip that device. Nothing is claimed until you confirm its form. After the last device, ReadyView returns you to the page you came from.
#The claim form
The form's header shows the device's MAC address, its model when ReadyView knows it, and the site it's going to.
| Field | What to enter |
|---|---|
| Name | Required. A name your team will recognize, such as "Lobby switch". |
| Configuration Template | Optional. A template to apply to the device. The list shows templates built for the device's model. When the model isn't known, the templates are grouped by model, and a template built for a different model isn't applied. See Configuration templates. |
| Tags | Optional. Tags from the site's tag list. Click Add tag to create a new one. |
| Description | Optional, under More settings. What the device is for. |
| Location | Optional, under More settings. Where it's installed, for example "Main Office, rack 4". |
When the claim finishes, ReadyView tells you how it went:
| Message | Meaning |
|---|---|
| Device claimed and configured! | The device is in the site with the name, template, and tags you chose. |
| The device was claimed, but its details could not be saved. Edit them from the device's page. | The device is in the site. Set its name and other details from its page. |
| A message that the template is built for another model, so it was not applied | The device was claimed, but the template you picked is for a different model. |
#Claim a device by QR code
You can read the QR code on a device's label instead of typing the MAC address.
- With your computer's camera: choose Scan QR Code, allow camera access when the browser asks, and hold the label up so the QR code is inside the camera frame. To type the address instead, click Enter Manually.
- From a photo: in the MAC address box, click the camera icon and choose a photo of the label. ReadyView reads the QR code from the picture.
Then continue with the claim form as above. If you've blocked camera access, ReadyView says Permission denied. Allow the camera for ReadyView in your browser's settings, or enter the MAC address.
#Claim many devices from a file
To claim a batch of devices into one site, use a CSV file. A file can hold up to 500 devices.
- On Claim Your Device, click Claim many devices from a file.
- Click Download Example to get a sample file.
- Fill in one row per device and save the file as CSV.
- Click Choose File and pick your file.
- Check the Review Before Claiming table, then click Claim N Devices, where N is the number of devices.
All devices in the file go into the same site: the one you started from, or the one you picked in Select Network. The file has no site column.
#File format
The file has four columns. Only MAC Address is required.
| Column | What to enter |
|---|---|
| MAC Address | The device's MAC address: 12 hex digits, with or without separators. |
| Name | The device's name. |
| Template | The name of a configuration template built for the device's model. Capitals don't matter. |
| Tags | The device's tags, separated by semicolons, for example Lobby;Floor 1. Tags the site doesn't have yet are added to its tag list. |
For example:
MAC Address,Name,Template,Tags
0013BA123456,Lobby Switch,Standard Switch,Lobby;Floor 1
0013BA654321,Rack A Switch,,Data Center
The header row is optional. Without one, ReadyView reads the columns in the order above. With one, the column names aren't case-sensitive, and ReadyView also accepts names such as mac, Device Name, Configuration Template, and Tag. CSV files saved from Excel work as they are.
#Review and results
The Review Before Claiming table lists every row with its Line, MAC Address, Name, Configuration Template, and Tags, and says how many devices will be claimed into the site. Rows with problems are marked and skipped, for example a row with no MAC address, a value that isn't a MAC address, or a MAC address already on an earlier line. To fix the file, click Choose another file.
While ReadyView claims the devices, it shows Claiming Devices. Keep the window open until it finishes. Import Finished then shows how many devices were claimed and configured, with a status for each row:
| Status | Meaning |
|---|---|
| Claimed | The device was claimed with everything in its row. |
| Partial | The device was claimed, but some of its extra settings didn't apply, for example a template name that doesn't exist or a template for a different model. |
| Failed | ReadyView refused the claim. The row shows the reason. |
| Skipped | The row had a problem in the file, such as a missing MAC address, so ReadyView didn't try to claim it. |
If ReadyView can't read the file at all, it tells you why, for example The file is empty. or No MAC Address column found.
#After you claim a device
The device joins the site and appears in the site's device list for its kind, such as Switches or Wireless, and in the site's dashboard counts. It shows Online once it's connected and reporting to ReadyView.
A device that has been offline for 7 days or more, or offline since an unknown time, is marked Dormant. See Device lists.
#Claim problems
| What you see | What to do |
|---|---|
| Invalid mac address detected | One of the addresses isn't 12 hex digits. Check it against the device's label. |
| No device with that MAC was found to claim | Check the MAC address on the label. If it's right, the device hasn't reached ReadyLinks yet. Check its internet connection and your firewall rules. |
| The device has been claimed by another organization | The device belongs to a different ReadyView organization. Contact ReadyLinks support to have it transferred. |
| The device is already in your organization | Claiming it into another site moves it to that site. |
| Claim Device stays greyed out after you enter an address | Your role doesn't allow claiming devices. Ask an administrator to check your role. |
#Firewalls
ReadyWall firewalls are claimed the same way, by their Device ID (MAC). See Connect a firewall for the full setup, including the steps on the firewall itself.
#Related guides
Last updated November 10, 2026