Ethernet series
Overview and specifications of the ReadyLinks Ethernet series Layer 2 access switches (GL-12xE-P600D, GL-24xE-P600D and GL-2xMT), including models, initial configuration, hardware specifications and LEDs.
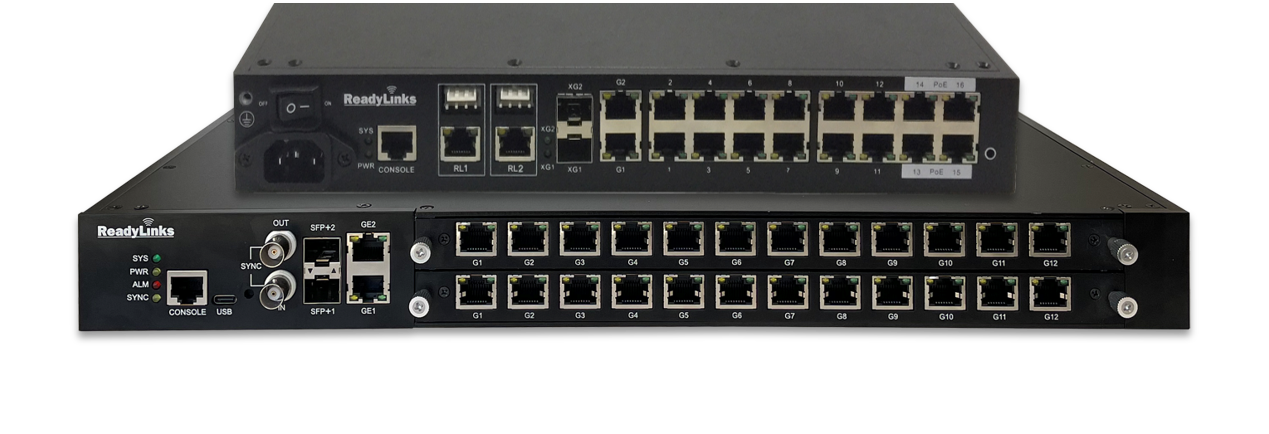
ReadyLinks Ethernet switches provide Layer 2 access switching, ideal for branch and campus deployments. The Ethernet series features a variety of power options designed to meet the diverse needs of branch and campus deployments. With models capable of providing up to 600W of power over a variety of port densities, including SFP-capable uplinks, the Ethernet line is fully ready to support future wireless infrastructure deployments across a variety of different environments.
#Docs
Quickstart guide
Mount, connect, claim and configure a switch.
Installation guide
Rack-mount installation for 1U switches.
L2/L3 capabilities
Embedded switching features and CLI examples.
Port and VLAN configuration
802.1Q tagging, port types and PVID.
Configuration templates
Deploy many devices from one base configuration.
Local management
Serial console and web interface access.
#Features
- Managed via ReadyView dashboard
- Automatic firmware upgrades
- SNMP/Syslog integration
- IPv4 ACL support
- DHCP Snooping
- 802.1X Authentication
- 10/100/1000 Mbps RJ45
- 10G SFP+
- IGMP Snooping
- VectorBoost
- VLAN models
- Phoneline or Coax
#Models
| GL-12xE-P600D | GL-24xE-P600D | GL-2xMT | |
|---|---|---|---|
| ReadyLink Ports | None | None | 2 (MTA/RJ45 Combo) |
| 1GbE RJ45 | 14 | 26 | 16 |
| 2.5GbE RJ45 (Uplink) | None | None | 2 |
| 10GbE SFP+ | 2 | 2 | None |
| PoE/PoE+ | 12 | 24 | 4 |
| PoE++ | 4 | 4 | 0 |
#Configuration
The basic initial configuration of an Ethernet series switch is just as simple as any other model of ReadyLinks switch. The steps below outline getting the device set up and configured for the first time. For advanced switch configuration, see Switch settings.
![BASE]
configure terminal
management mode readyview
readyview password-connect username readyview password readyview
readyview password-connect filenumber 1 username readyview password readyview
end
![VLAN_INTERFACE]
configure terminal
interface vlan 1
ip address dhcp
end
end
![SNTP]
configure terminal
sntp client server-address time.google.com response-time 3 zone-offset GMT0 time-offset 0
end- Claim the device to your Organization in the ReadyView Dashboard.
- Add the device to a Network.
- Physically connect the device to the local network.
- Allow the device to complete check-in and perform any initial firmware upgrades.
- Finish configuring the device from the ReadyView Dashboard.
#Technical specifications
#Hardware
| GL-12xE-P600D | GL-24xE-P600D | GL-2xMT | |
|---|---|---|---|
| ReadyLink Ports | None | None | 2 (MTA/RJ45 Combo) |
| 1GbE RJ45 | 14 | 26 | 16 |
| 2.5GbE RJ45 (Uplink) | None | None | 2 |
| 10GbE SFP+ | 2 | 2 | None |
| Console | USB Type C / RJ45 Combo | USB Type C / RJ45 Combo | RJ45 |
#Physical
| GL-12xE-P600D | GL-24xE-P600D | GL-2xMT | |
|---|---|---|---|
| Mount Type | 1U Rack Mount | 1U Rack Mount | 1U Rack Mount |
| Dimensions | 12"(L) x 19"(W) x 1.75"(H) | 12"(L) x 19"(W) x 1.75"(H) | 10"(L) x 12"(W) x 1.75"(H) |
| Power Consumption | 60-300W | 60-600W | 60-100W |
| Operating Temperature | 32 ~ 104 °F | 32 ~ 104 °F | 32 ~ 104 °F |
#Throughput and capabilities
| GL-12xE-P600D | GL-24xE-P600D | GL-2xMT | |
|---|---|---|---|
| PoE/PoE+ Capable | Yes, 300W | Yes, 600W | Yes, 120W |
| Switching Capacity | 128 Gbps | 128 Gbps | 128 Gbps |
| AC Power Supply Option | Redundant (600W max) | Redundant (600W max) | Single (120W max) |
| DC Power Supply Option | 44-54VDC / 3-15A (In/Out power stacking) | 44-54VDC / 3-15A (In/Out power stacking) | None |
| Power Stacking | Stack up to 4 units for 2,160W of dynamic PoE+, PoE++ budget | Stack up to 4 units for 2,160W of dynamic PoE+, PoE++ budget | None |
#Troubleshooting
#Common troubleshooting
#My device won't connect to the ReadyView dashboard
Confirm the device is on and connected to the Internet. See Staging in the deployment guide for additional information on staging devices.
#My device is stuck in an "Adopted" status
This means you have successfully claimed your device, but the device is unable to communicate with the ReadyView dashboard. Ensure the device is powered on and connected to the Internet.
#I need to change the default management interface to connect the device to the dashboard
Access the device using one of the local management options and adjust the settings to bring the device online.
#LEDs
Ethernet series switches use LEDs to show the device's status. While the device powers on, all the LEDs flash to indicate the device is booting up.
| Function | LED Status | Meaning |
|---|---|---|
| System | Green | System has booted |
| Off | System is off | |
| Power | Green | Device is powering on |
| Off | System is off | |
| Alarm | Red | There is an alarm |
| Off | There are no alarms | |
| Sync | Green | Sync has been established |
| Off | There is no device sync | |
| SFP Port | Yellow | 10Gb link |
| Green | 1Gb link | |
| Off | No fiber link | |
| ReadyLink Port | Green | PoX is enabled on the port |
| Yellow | Data link to the IPC |
Last updated March 23, 2021