Site settings
Set up a site's wired networks, Wi‑Fi, reports, documents, access, firmware schedule, and provisioning options from its Settings page.
Each site has its own Settings, where you set the wired networks (VLANs) and Wi‑Fi that its devices carry, decide who can open the site, and choose how firmware and configuration templates are applied. Open a site, then click the cog icon in the left rail.
#Find a setting
The settings menu has two groups. Type in Search settings at the top to jump to a setting by name.
| Group | Page | What it's for |
|---|---|---|
| Site | Networks | Wired VLANs and settings shared by every switch at the site |
| Wi‑Fi | SSIDs and the access point channel plan | |
| Security | Not available for sites yet. For ReadyWall firewalls, see Firewalls | |
| ReadyOn | Serviceable addresses and internet services | |
| Report | A PDF report for the site | |
| Documents | Design files and other documents for the site | |
| Organization | Who can see this site | Everyone in your organization, or only the roles you choose |
| General | Site name, firmware schedule, provisioning, tags, alerts, and support access |
Networks is unavailable until the site has a wired device, Wi‑Fi until it has an access point, and ReadyOn until your organization has a ReadyOn account.
#Networks
Networks lists the site's VLANs and the settings applied to every switch at the site.
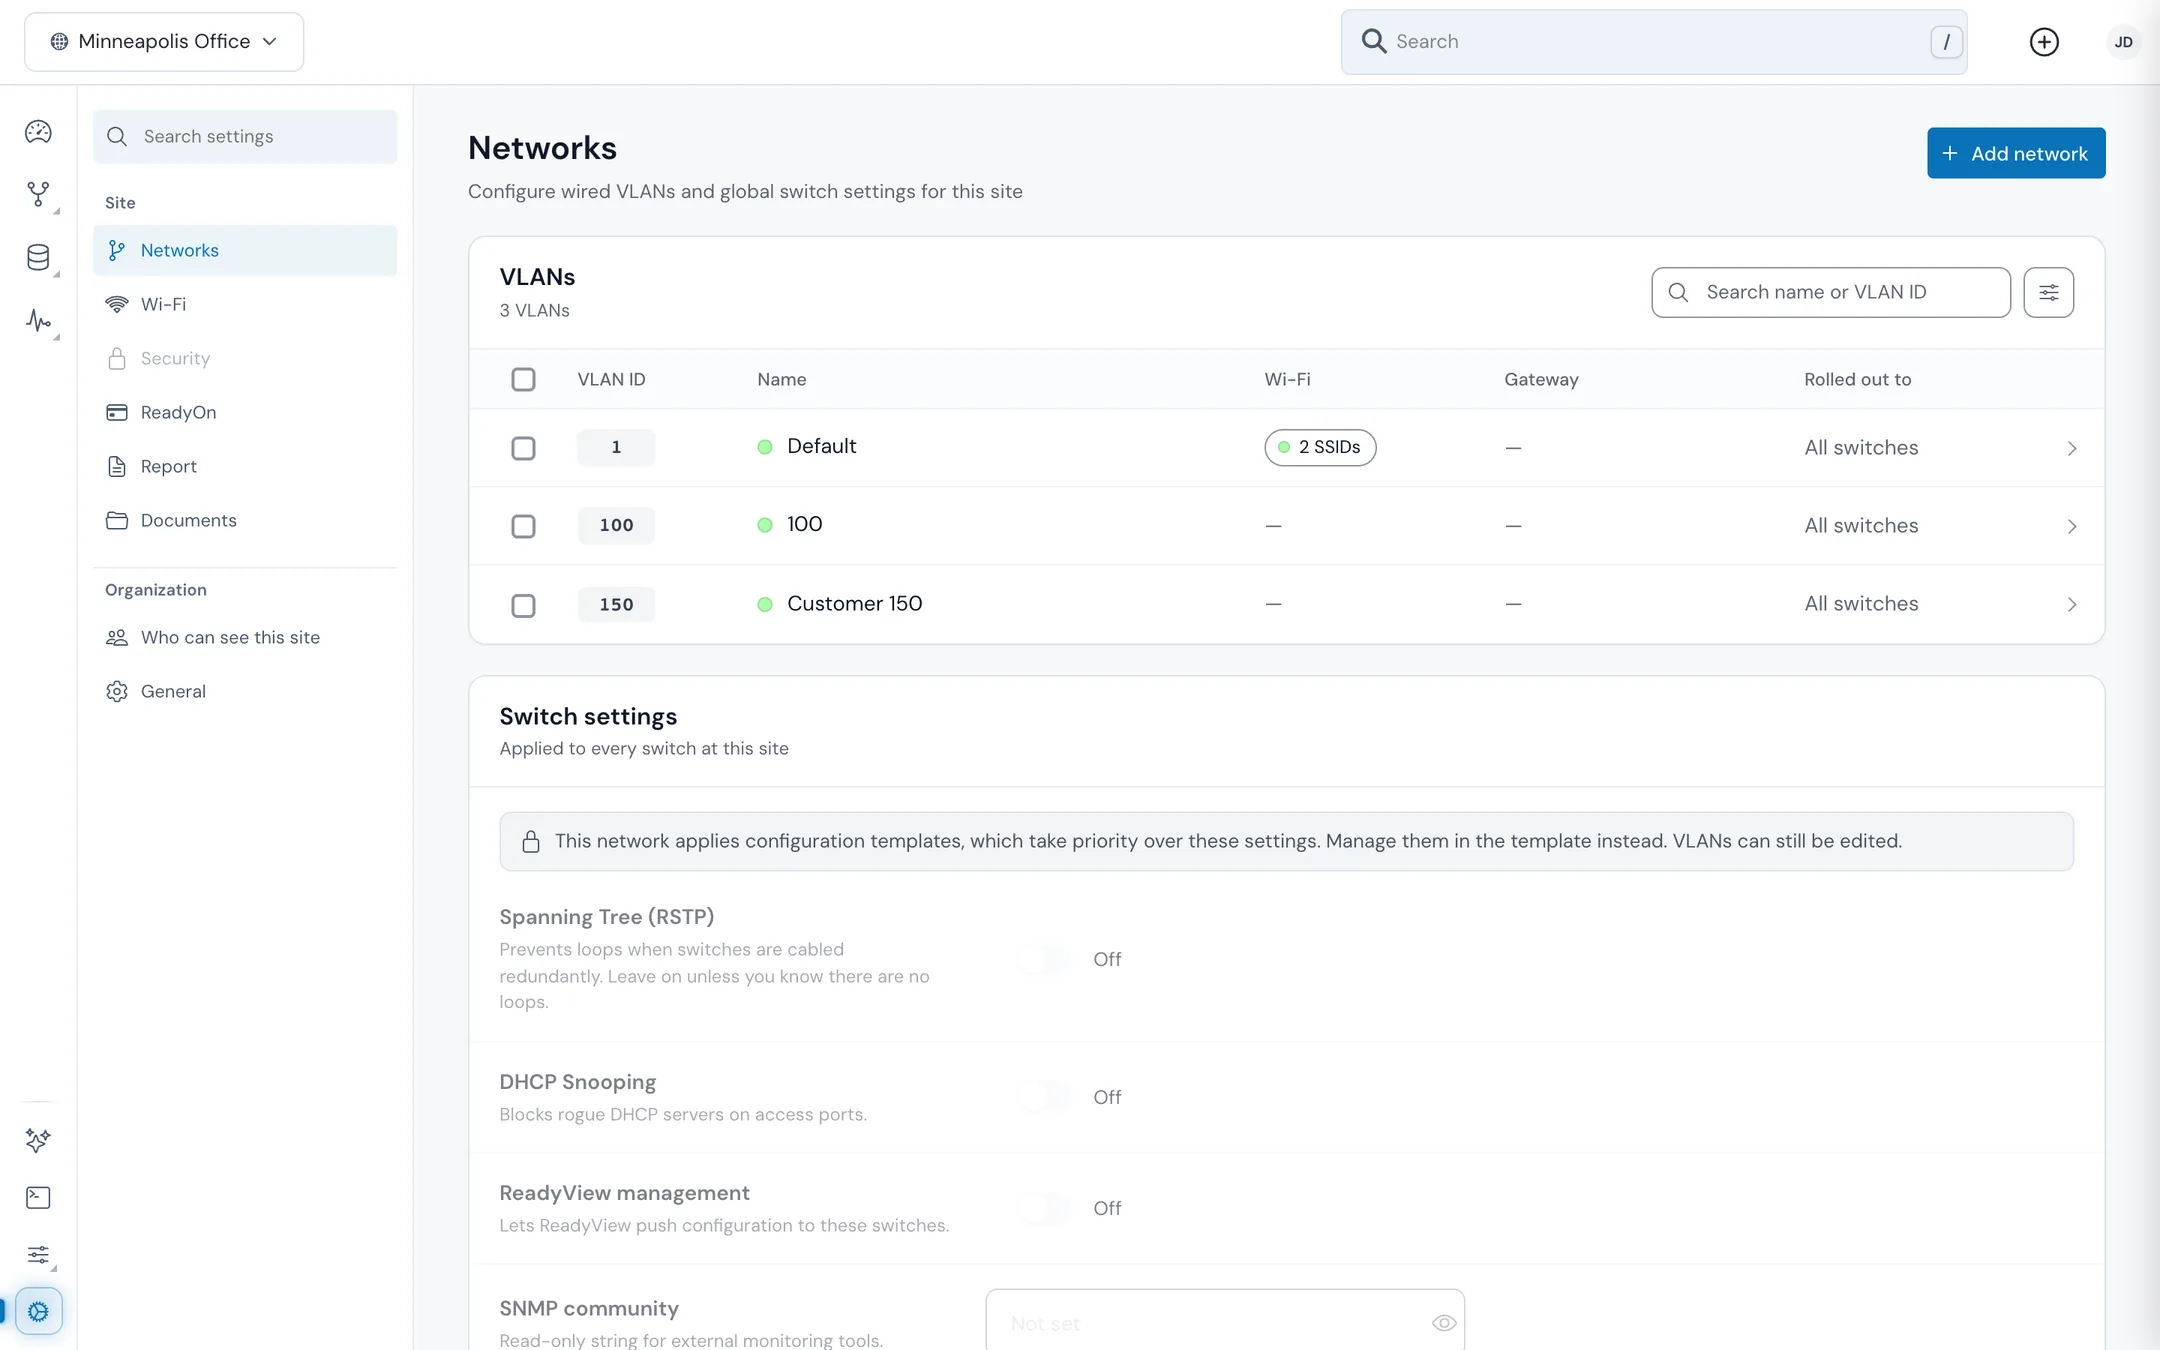
#The VLANs table
| Column | What it shows |
|---|---|
| VLAN ID | The VLAN number |
| Name | The network name |
| Wi‑Fi | How many SSIDs use this VLAN |
| Gateway | The network's gateway, when it has one |
| Rolled out to | Which switches carry the VLAN: All switches, a number of switches, or None |
Search with Search name or VLAN ID. Select VLANs with their checkboxes to change their Color or Delete them in one go. Deleting removes the VLAN from every switch at the site. If two networks share a VLAN ID, the table marks them Duplicate ID and a banner offers Review.
#Add a network
- Click Add network.
- Enter a Network Name (up to 64 characters) and a VLAN ID from 1 to 4094.
- Optionally choose an LED Color for the network under LED Settings.
- If the site has a ReadyWall firewall, turn on Add it to firewall name in the ReadyWall section. This sets up the gateway too: its address, handing out addresses, and what the network can reach.
- Under Roll out to switches, choose where the VLAN goes: All switches, switches with certain Switch tags, specific Switches, or None.
- Click Create network.
Offline switches are marked Pending and don't pick up the VLAN on their own when they come back; apply it to them later. When you edit a network, switches you remove from the rollout keep the VLAN until you delete the network.
#Switch settings
The Switch settings card applies to every switch at the site.
| Setting | What it does |
|---|---|
| Spanning Tree (RSTP) | Prevents loops when switches are cabled redundantly. Leave it on unless you know there are no loops |
| DHCP Snooping | Blocks rogue DHCP servers on access ports |
| ReadyView management | Lets ReadyView push configuration to these switches |
| SNMP community | A read-only string for external monitoring tools. Click Show community string to see it |
| Identify switches | Light All LEDs flashes every port LED so you can find the switches on site. It acts straight away and isn't saved |
Changes show a bar at the bottom of the page with Discard and Save changes.
The Config templates card lists switch templates that keep their VLANs in sync with this network. You link a template to a network from the template itself; click Configuration Templates to go there.
#Wi‑Fi
Wi‑Fi manages the site's SSIDs and the channels its access points use.
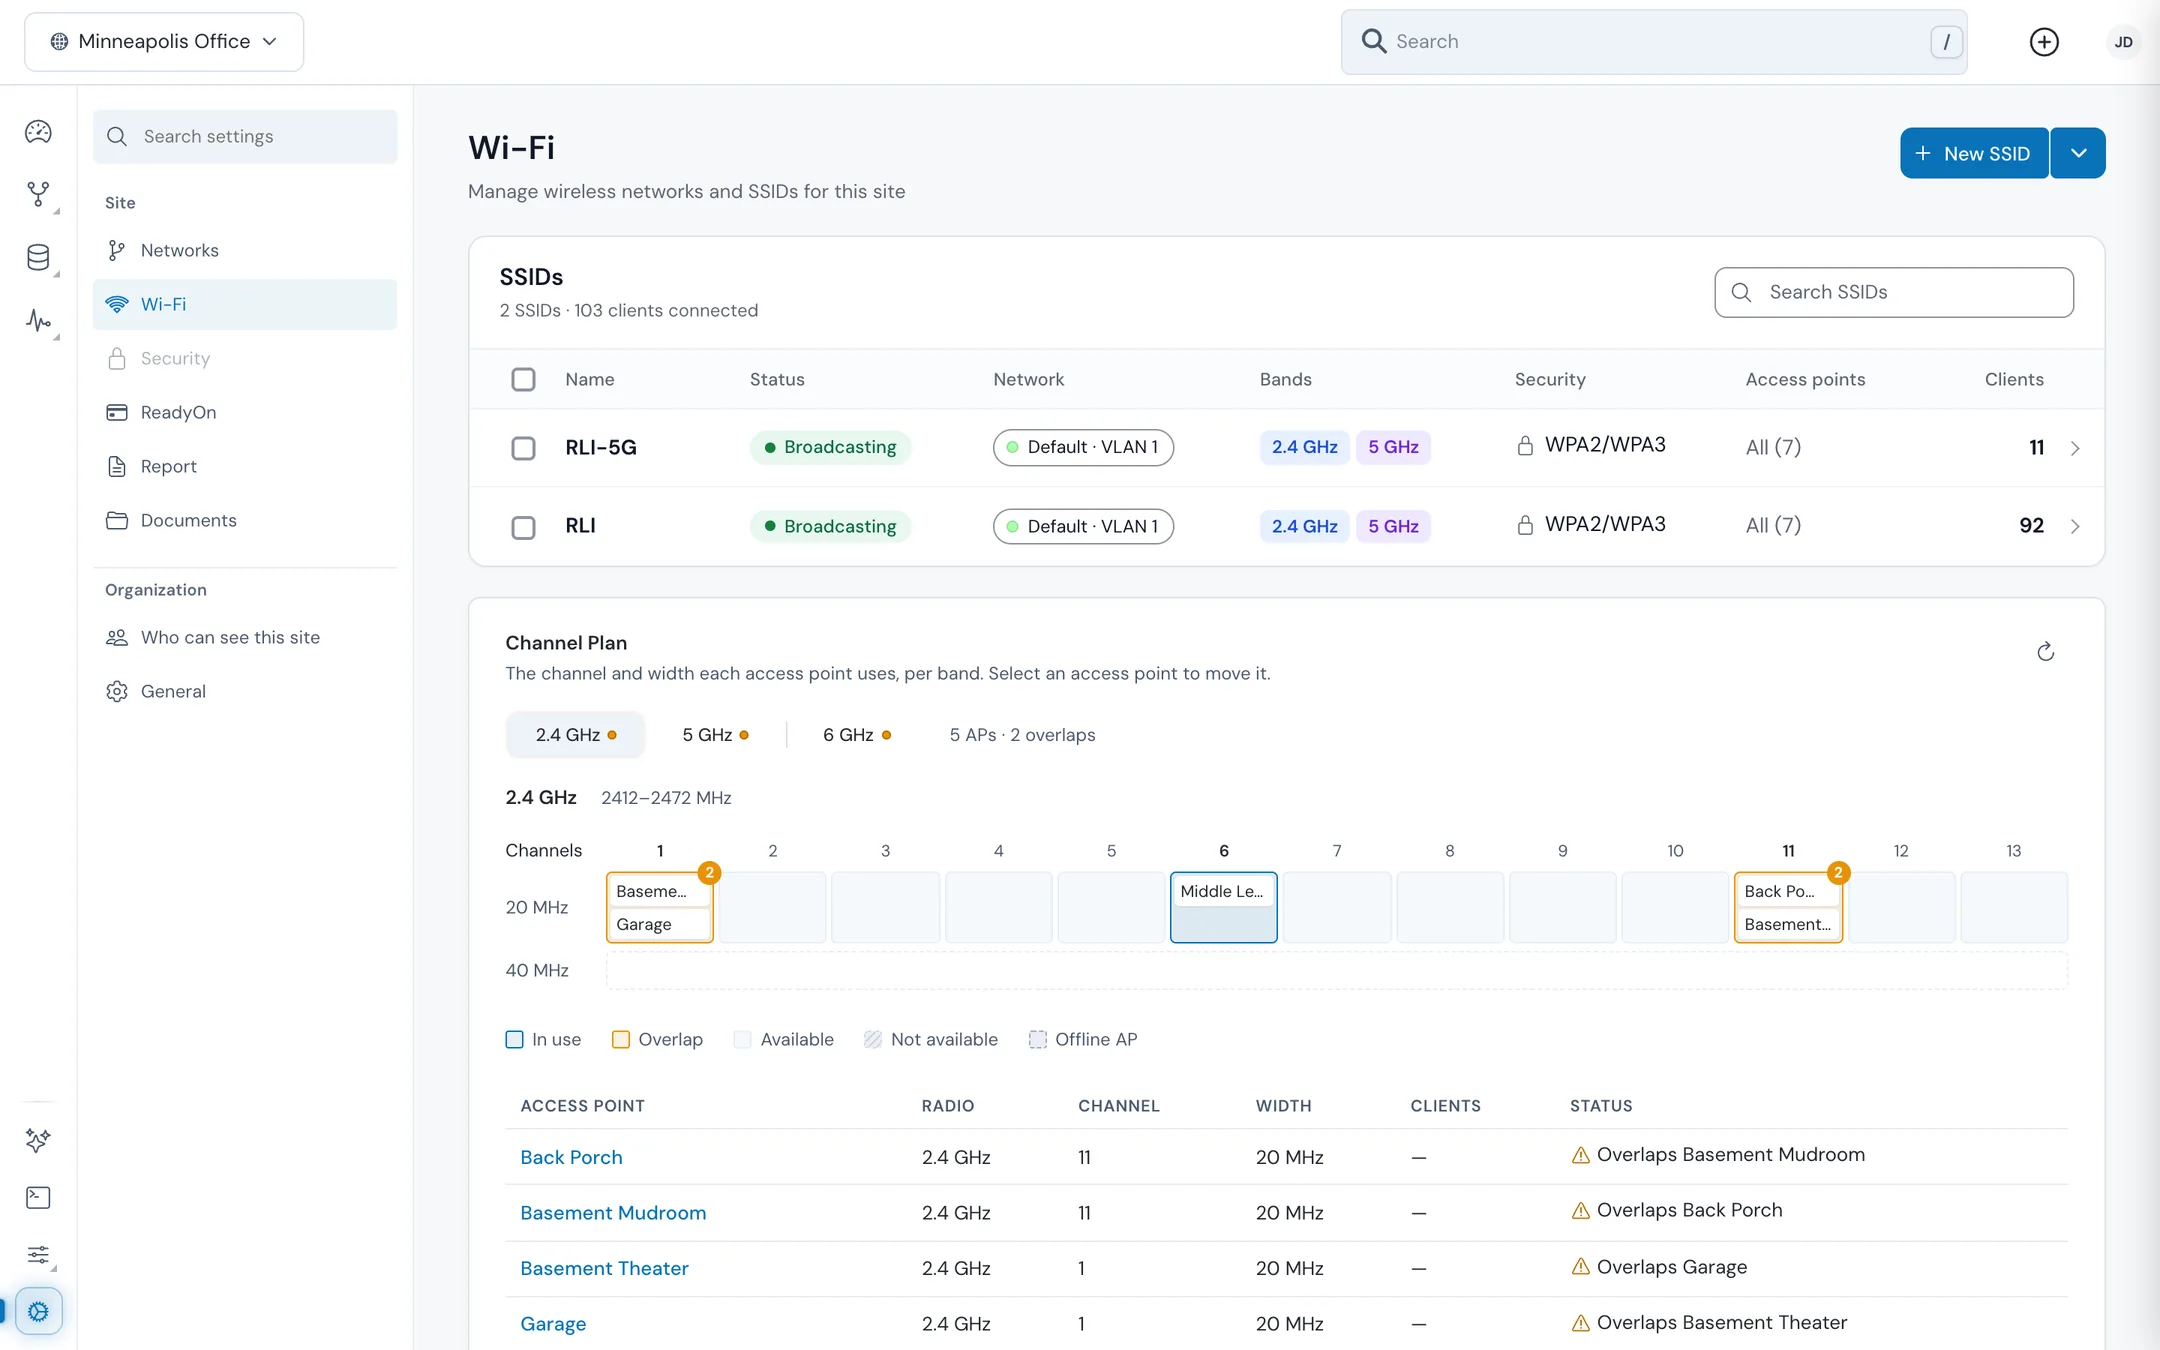
The SSIDs table shows each SSID's Status, Network (VLAN), Bands, Security, Access points, and Clients. An SSID with weak security is flagged, because anyone nearby can join it or read its traffic. After a change, the table shows the rollout progress. Offline access points pick the change up when they reconnect. If a rollout fails, use Retry or Details.
#Add an SSID
- Click New SSID.
- Enter a Name and a Password (8 to 63 characters).
- Choose the Network (VLAN) the SSID's clients join.
- Under Broadcasting APs, choose all access points, a group, or specific ones.
- Choose the Radio Band: 2.4, 5, or 6 GHz. 6 GHz needs WPA3 Personal.
- Open Advanced to set the Security Protocol (Open, WPA2 Personal, WPA2/WPA3 Personal, WPA3 Personal), protected management frames, hiding the Wi‑Fi name, client isolation, client limits, and per-client speed limits.
- Click Create.
To change an SSID, click it, edit, and click Apply. To remove SSIDs, select them and click Remove. Changes are sent to the access points right away.
#Channel plan
The Channel Plan card shows the channel and width each access point uses on each band, and where they overlap. Pick a band tab (2.4, 5, or 6 GHz) to see its grid and the list of access points.
- Click an access point.
- Choose a Channel and Width for the radio.
- Click Apply. Clients on that radio briefly disconnect while it changes.
#ReadyOn
ReadyOn lists the site's Serviceable Addresses. Click Add Serviceable Address to add one. See ReadyOn for how internet service is sold and billed.
#Report
Report builds a PDF about the site in your browser.
- Under Networks to Include, select the networks to cover, or click Select all.
- Under Sections to include, choose from Basic Info, Device (optionally with serial numbers, MAC addresses, and firmware versions), Clients, Topology, Configuration (VLANs and SSIDs), and Switching Configuration (port status, VLAN, and PoE for each switch; turn on Every port on every switch for full port tables).
- Click Generate PDF. The report downloads when it's ready.
#Documents
Documents keeps cabling diagrams, rack elevations, floor plans, and other design files with the site.
- Click Upload file, or drop a file on the page.
- Edit the Display name if you like. It defaults to the file name and must be unique.
- Click Save.
Each document can be viewed, downloaded, or removed. Anyone who can see the site can view and download documents. Uploading and removing need permission to update the site.
#Who can see this site
By default, everyone in your organization can see the site. Make it private to limit it to certain roles.
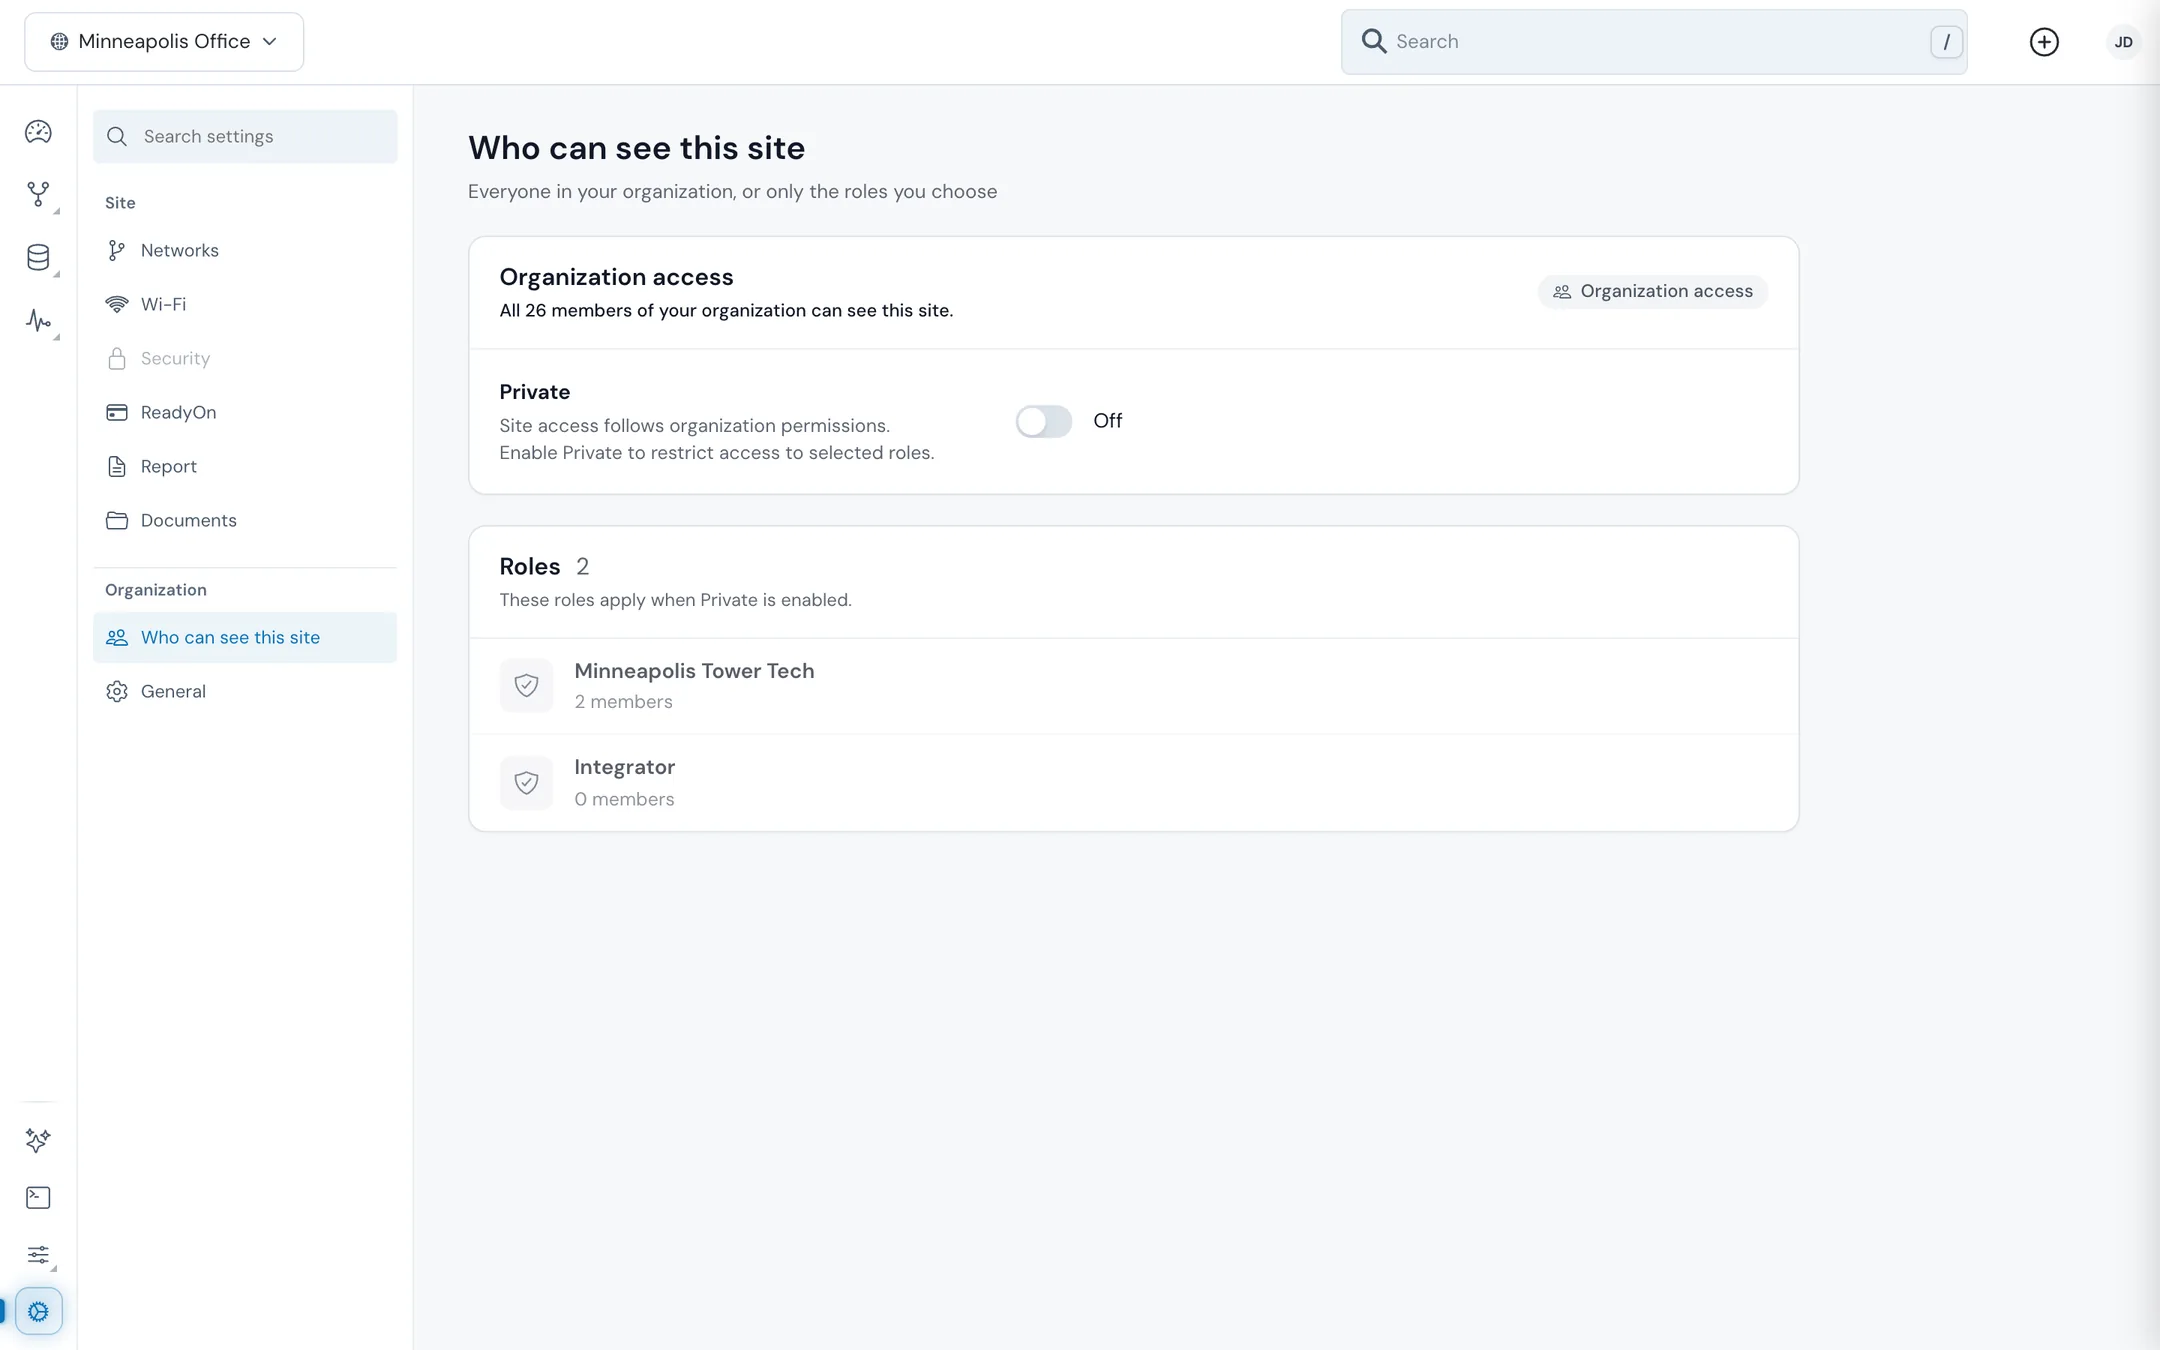
- Turn on Private.
- Click Add Roles and choose the roles that may open the site. Each role shows how many members it has.
- Read the warning, which says how many members will lose access.
- Click Save.
Roles are set up under Administration > Roles. See Roles and permissions.
#General
General holds the site's identity and the options that control automatic changes.
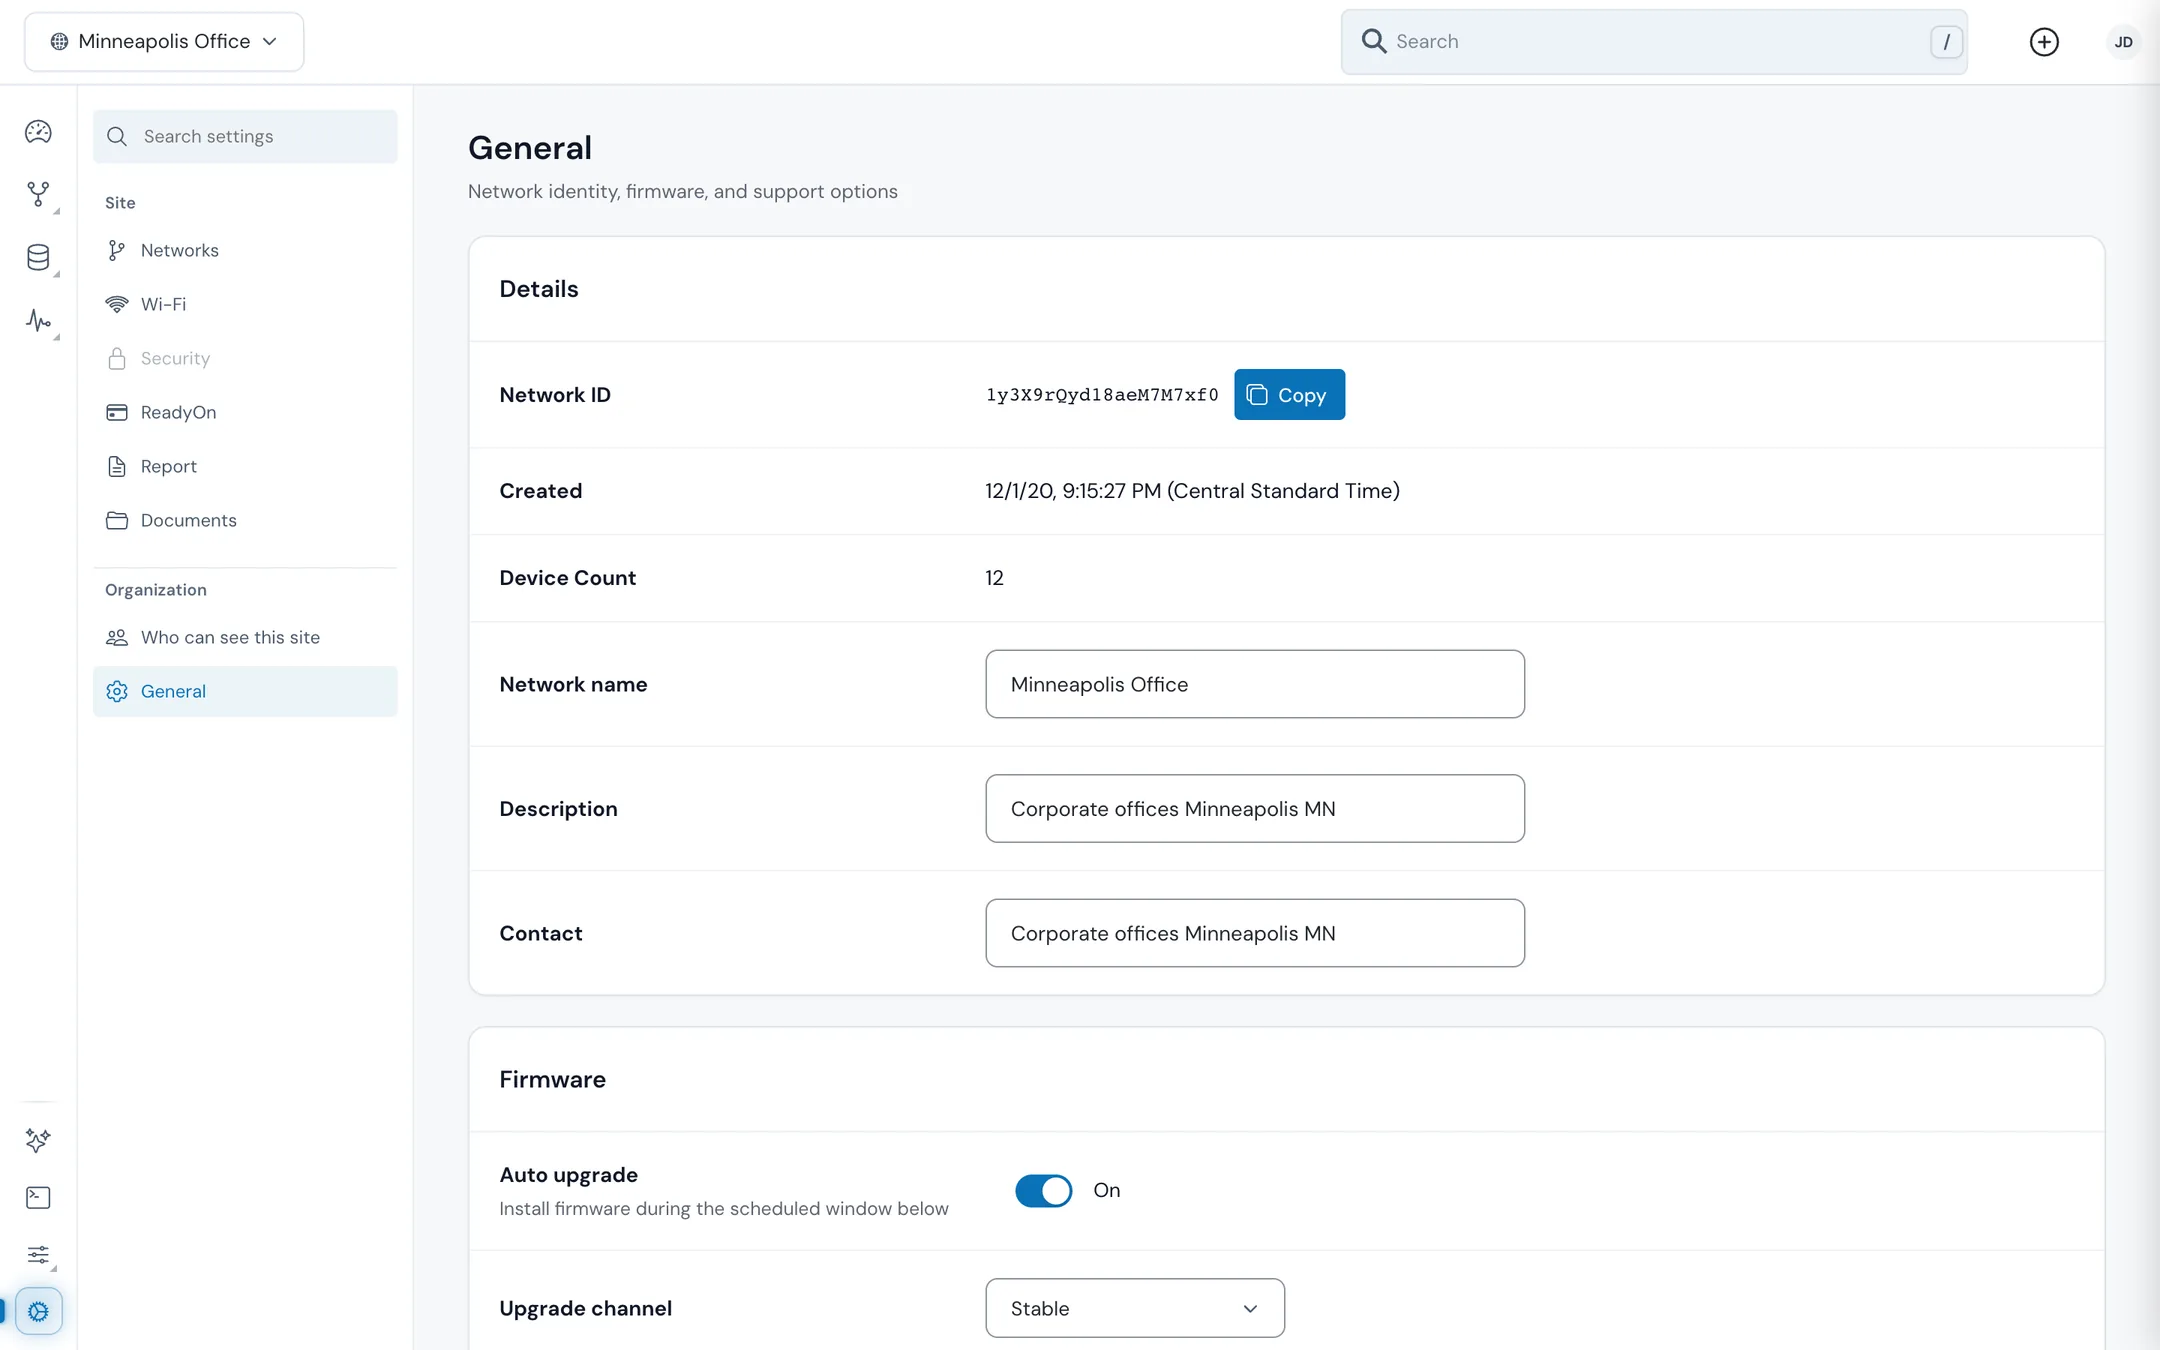
| Card | Settings |
|---|---|
| Details | Network ID (with a copy button), when the site was created, its device count, Network name, Description, and Contact |
| Firmware | Auto upgrade, Upgrade channel (Stable or Beta), Upgrade day, Window start, and Window end. The schedule is available only while auto upgrade is on. See Firmware and maintenance |
| Provisioning | Auto-apply templates applies a device's assigned configuration template once it comes online. Apply changes when offline switches reconnect stores changes made while a GL switch is offline and applies them once it reconnects; unapplied changes are discarded after 14 days |
| Tags | Tags for the site's devices, and Template rules that give tagged devices the template chosen for their model. A template picked on a device itself always wins. Rules apply nothing while Auto-apply templates is off |
| Notifications & support | Email alerts sends email and webhook alerts when devices go offline or a fiber light level goes out of range. Remote support lets ReadyLinks support access the site. API documentation opens the ReadyLinks API reference |
| Danger zone | Delete network permanently removes the site and its configuration |
Click Save changes in the bar at the bottom to keep your edits, or Discard to drop them.
#Related guides
Configuration templates
Build templates, link them to networks, and apply them automatically.
Firmware and maintenance
Upgrade switches now, on a schedule, or automatically.
Events, logs, and alerts
Choose which alerts are sent and where.
Roles and permissions
Create the roles you give access to private sites.
Last updated November 10, 2026